Getting Started with Complementary Unbound: What You Need to Know
Complementary Shaders Unbound is one of the most popular shader packs for Minecraft, known for enhancing the game’s visuals while maintaining a balanced performance. Whether you’re looking for realistic lighting, smooth shadows, or vibrant colors, this pack offers an immersive experience without being too demanding on your system. In this guide, I’ll walk you through how to download and install Complementary Shaders Unbound in 2025, so you can enjoy a stunning Minecraft experience.
Quick Navigation
- Important
- Step 1: Download Complementary Unbound
- Step 2: Install Complementary Unbound
- Complementary Shaders Unbound Troubleshooting
- FAQs about Complementary Shaders Unbound
⚠️ Important
OptiFine or Iris Mod – You need one of these to load shader packs. Install OptiFine for more customization, or install Iris for better mod compatibility and better performance.
Step 1: Download Complementary Unbound
First, you’ll need to download “Complementary Shaders Unbound” from a trusted source. Follow these steps to ensure you get the correct file:
- Visit the official Complementary Shaders Unbound page or click the Button below.

You will be taken to the Curseforge “Complementary Shader-Unbound” files page.
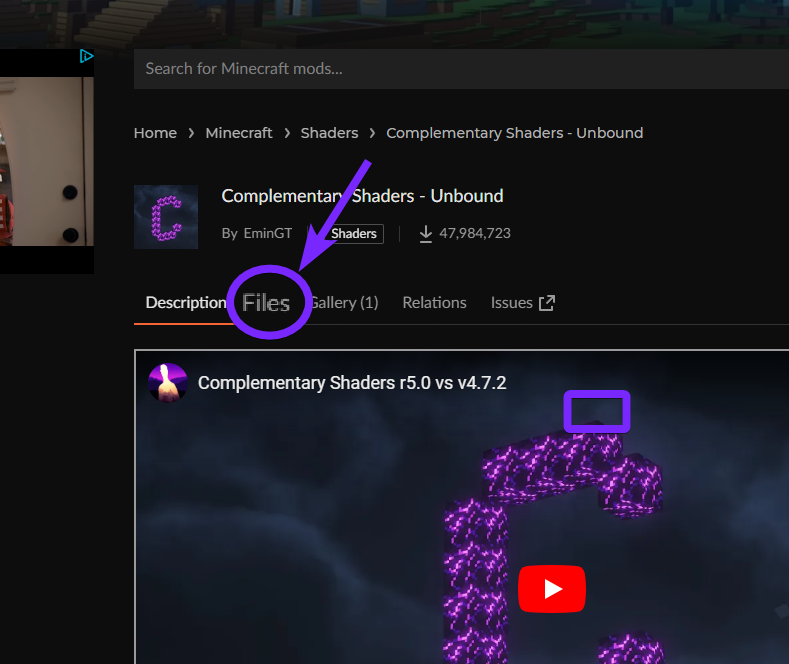
Once in the Files tab, locate your preferred version.
- Click the three dots (⋮) next to it and select “Download file” (the file will be downloaded in a .zip format).

After the download is complete, you can find the file in your browser’s Download history (usually in the top right corner).
- Click the folder icon to open the location of the downloaded file.
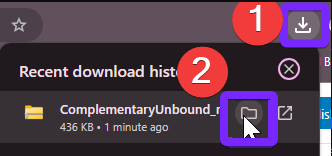
You’ll be directed to your system’s default “Downloads” folder, where the shader file is stored.
- Copy the “ComplementaryUnbound.zip” file (we’ll paste it later into the OptiFine or Iris shaders folder).

Now that you’ve successfully downloaded Complementary Unbound Shaders, let’s proceed with the installation!
Step 2: Install Complementary Unbound
With the Complementary Shaders – Unbound file downloaded from the previous step, it’s time to Install Complementary Unbound in 2025 and use it in Minecraft.
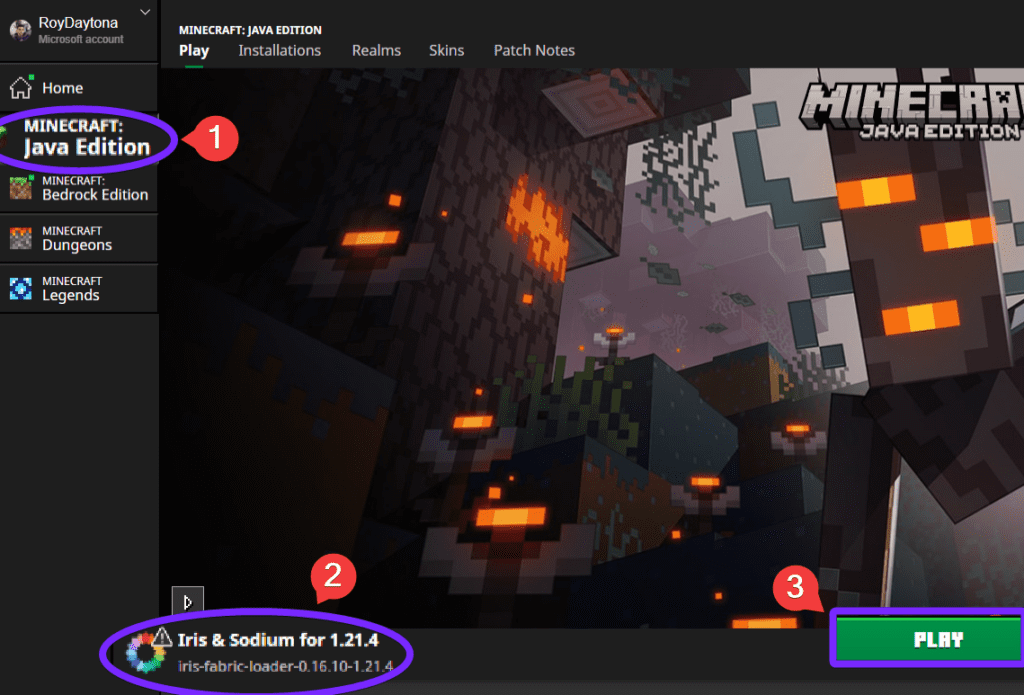
- Open the Minecraft Launcher and select your OptiFine or Iris installation from the bottom left, then click “Play”.
⚠️ Warning: If you don’t have OptiFine or Iris, you’ll need to install one of them first. (For this guide, I’ll be using Iris, so the shader menu may appear slightly different.)
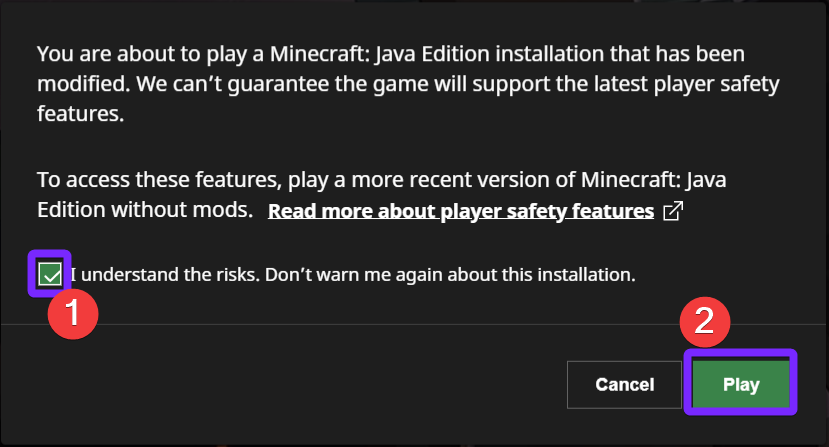
If a Player Safety Warning appears, mark “I understand the risks”, then click Play again. (Feel free to Read more about player safety features)
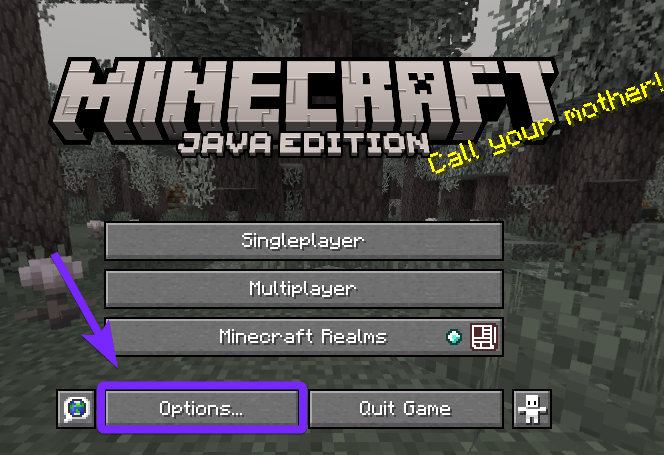
- Once inside Minecraft, go to “Options…”
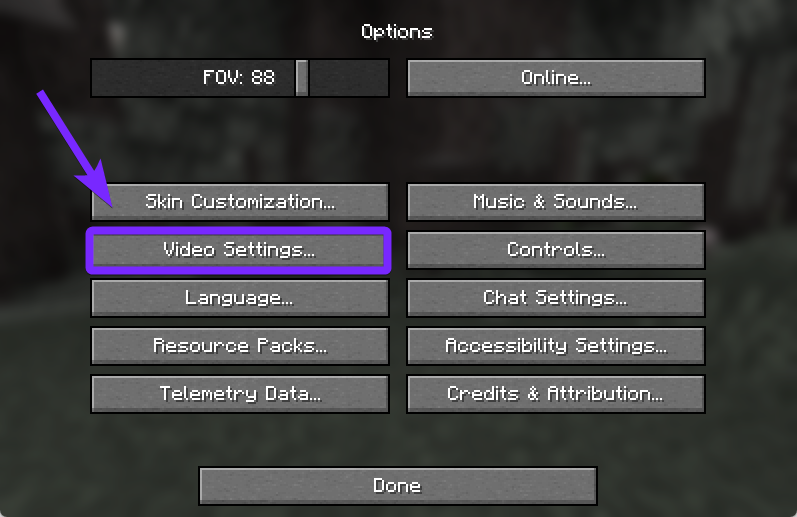
- Click “Video Settings…”
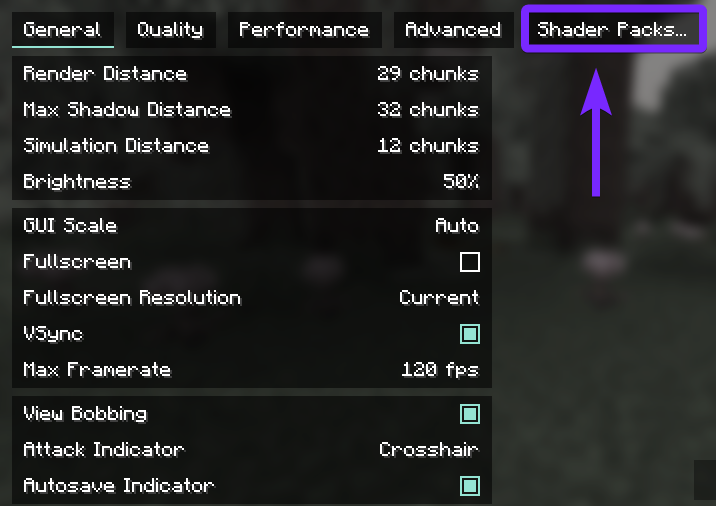
- Select “Shader Packs…“
- In the Shaders menu, select “Open Shader Pack Folder…” to access the shader files.
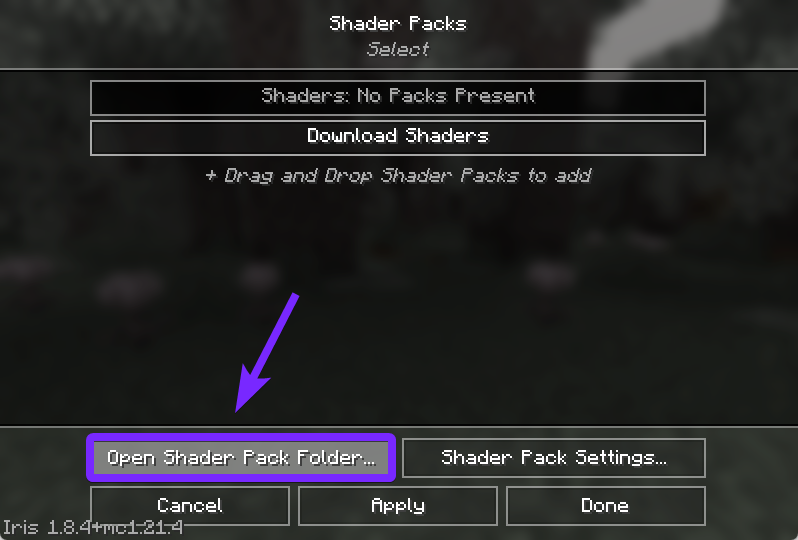
Next, the Shaderpacks folder will open on your computer.
- Paste the “ComplementaryUnbound.zip” file you downloaded in the first step into the Shaderpacks folder. ⚠️ Do not extract the file! ⚠️
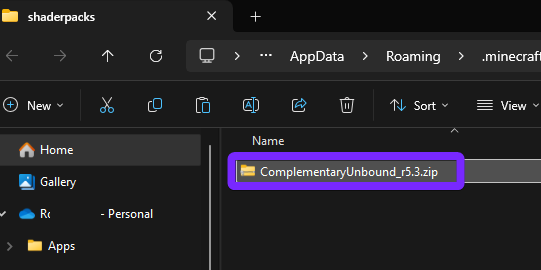
- Close the shaderpacks folder.
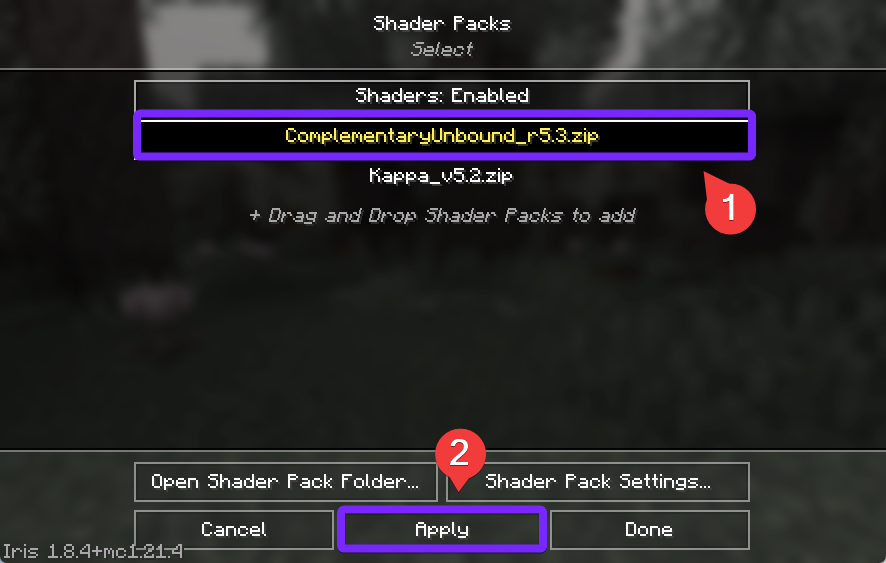
Returning to Minecraft, the Complementary Shader – Unbound pack should now be visible in the Shader Packs menu.
- Select “Complementary Unbound” to enable it, and click “Apply“
With Complementary Shaders – Unbound installed, your Minecraft world in 2025 will look incredibly realistic, featuring enhanced lighting, dynamic shadows, detailed textures and the most important, very fluid.
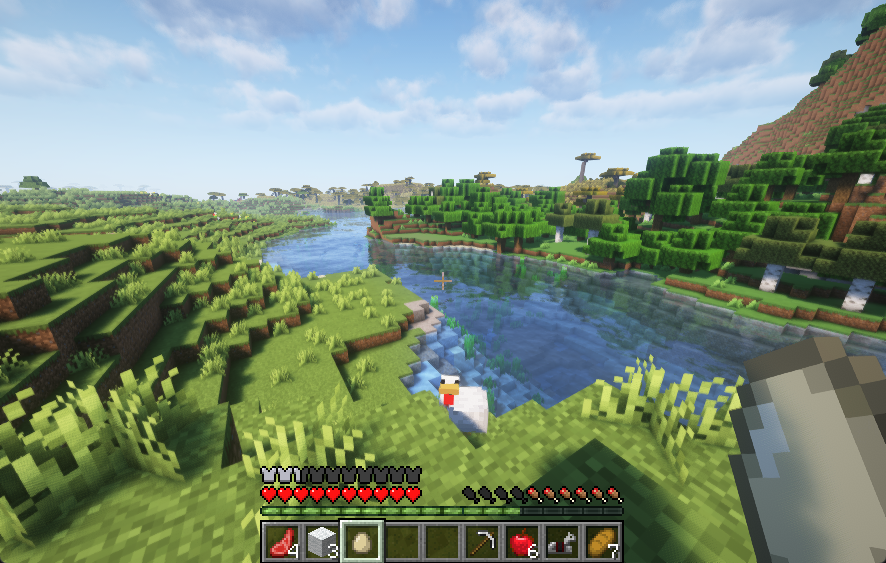
Enjoy the enhanced visuals, and feel free to change the shader settings to get the perfect balance between performance and graphics.
Looking for more shaders? Try Kappa Shaders for another stunning visual upgrade!
Complementary Shaders – Unbound Troubleshooting
Game Lag or Low FPS
Complementary Shaders Unbound can be demanding, especially on lower-end PCs. Adjusting shader settings, lowering render distance, or enabling “Performance Mode” can help improve FPS.
Black Screen or Graphics Glitches
If textures appear black, flashing, or missing, ensure your graphics drivers are up-to-date. Also, try switching between OptiFine and Iris to see if the issue persists.
Shaders Not Appearing in the Menu
If the shader pack doesn’t show up after you Install Complementary Shaders – Unbound in 2025, make sure the .zip file is in the correct shaderpacks folder and that you’re using a compatible version of OptiFine or Iris.
FAQs About Complementary Shaders – Unbound
Does Complementary Shaders Unbound work with all versions of Minecraft?
Complementary Shaders is designed for Minecraft Java Edition and works best with the latest versions. However, older versions may require specific OptiFine or Iris builds for compatibility.
Can I use Complementary Shaders Unbound on a low-end PC?
Yes, but you may need to adjust settings. Lowering render distance, disabling certain effects like Volumetric Lighting, or using Performance Mode can help improve FPS.
Why do my water and sky look weird or glitched?
This can happen due to incompatible resource packs or incorrect shader settings. Try resetting the shader settings to default or disabling conflicting mods and resource packs.