
Looking to spice up your Minecraft world with intense lighting and shadows? This guide shows you how to download and install the Insanity Shader for Minecraft. Whether you’re after a creepy vibe or dramatic realism, this Minecraft shader delivers epic results.
Download Insanity Shaders


Intense Horror-Like Atmosphere
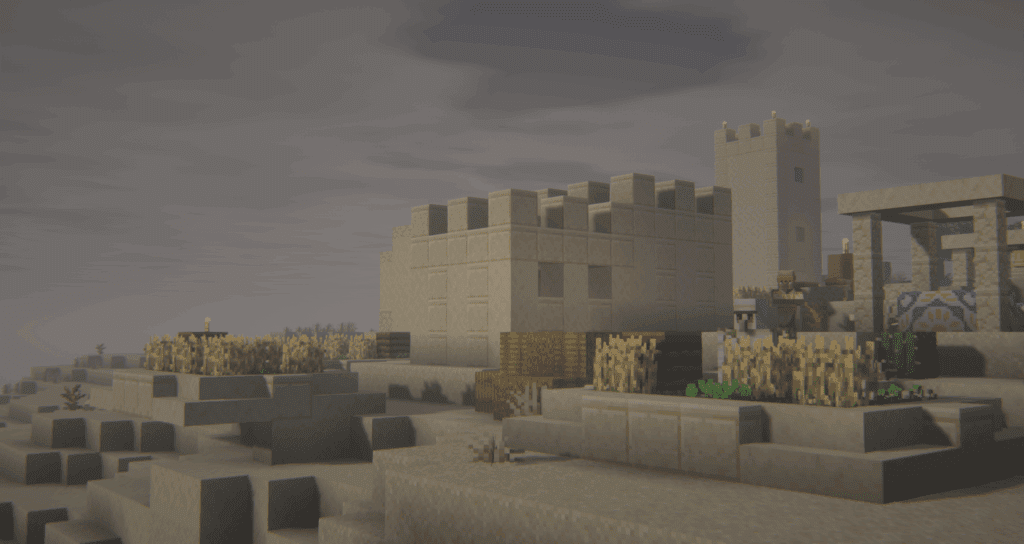
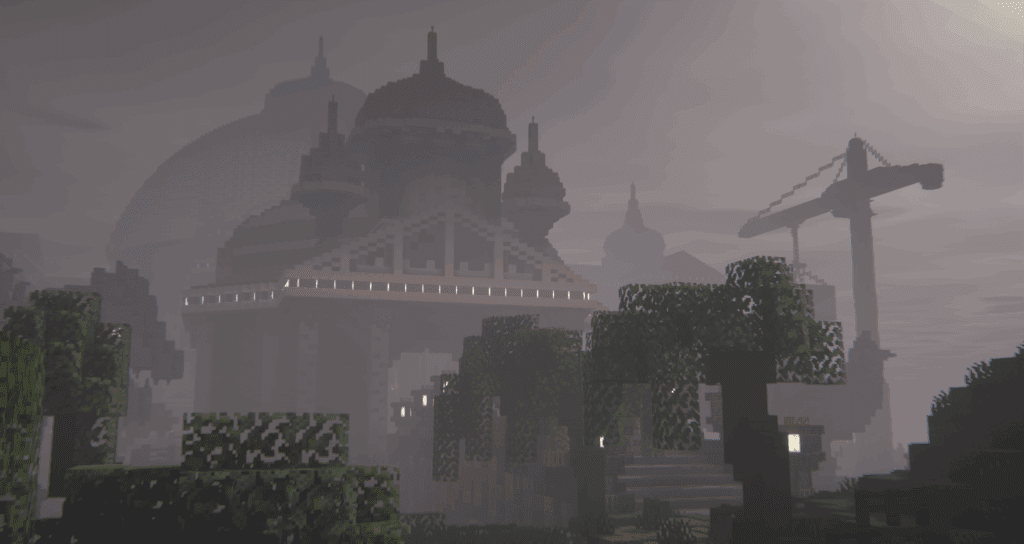
The Insanity Shader is the ultimate choice for Minecraft players looking to create a dark, creepy, and atmospheric gameplay experience. This shader transforms your Minecraft world into a hauntingly realistic environment with heavy fog, deep shadows, and unsettling lighting effects that bring every forest, cave, village, and coastline to life in a whole new way. Whether you’re building a spooky mansion, exploring an abandoned mineshaft, or surviving in a foggy swamp biome, the Insanity Shader enhances the horror vibe with cinematic visuals that feel straight out of a scary movie. If you’re searching for the best Minecraft shader for a horror-themed world or want a shader pack that adds moody, high-contrast lighting to your builds, the Insanity Shader is the perfect download.
Stylized Lighting Effects
The Insanity Shader is widely known for its unique and creative lighting effects that set it apart from other Minecraft shader packs. Instead of bright and vibrant visuals, this shader introduces flickering shadows, blood-red skies, glowing ambient lights, and a gritty post-apocalyptic atmosphere that completely changes how Minecraft feels. These dramatic effects give your game a cinematic look, ideal for horror maps, survival adventures, or eerie roleplay builds. If you’re looking for a Minecraft shader with red skies, immersive darkness, and atmospheric lighting that adds tension and mood to every moment, the Insanity Shader is a top-tier choice that’s designed to unsettle and impress.
Minecraft Support for “Insanity Shader”
Insanity Shader is compatible with the following Minecraft versions:
1.21.5 – 1.21.4 – 1.21.3 – 1.21.2 – 1.21.1 – 1.21 – 1.20.6 – 1.20.5 – 1.20.4 – 1.20.3 – 1.20.2 – 1.20.1 – 1.20 – 1.19.4 – 1.19.3 – 1.19.2 – 1.19.1 – 1.19 – 1.18.2 – 1.18.1 – 1.18 – 1.17.1 – 1.17 – 1.16.5 – 1.16.4 – 1.16.3 – 1.16 – 1.15 – 1.14 – 1.12.2 – 1.12 – 1.11 (and more)
Gallery

Vanilla vs Insanity Shader Comparison
How to Install “Insanity Shader”
Follow these simple steps to install Insanity Shader in Minecraft using Iris:
- First, install Iris, the mod required to run the Insanity Shader.
- Download the latest version of Insanity Shader from the official CurseForge page: Insanity Shader Files.
- Open Minecraft and select the Iris profile from the launcher.
- Go to “Options” > “Video Settings” > “Shader Packs” and click “Open Shader Pack Folder.”
- Drag and drop the downloaded Insanity Shader
.zipfile into that folder. - Go back into Minecraft, select Insanity Shader from the list, and click “Apply.”
That’s it! You’re now ready to experience the madness.
Explore More Shaders
Want more shaders like this? Check out our other guides on Top 10 Best Minecraft Shaders and Best Minecraft Shaders for Low-End PCs. Keep exploring and upgrading your Minecraft visuals on Tutorialy!


