Getting Started with Natural Vision Evolved: What You Need to Know
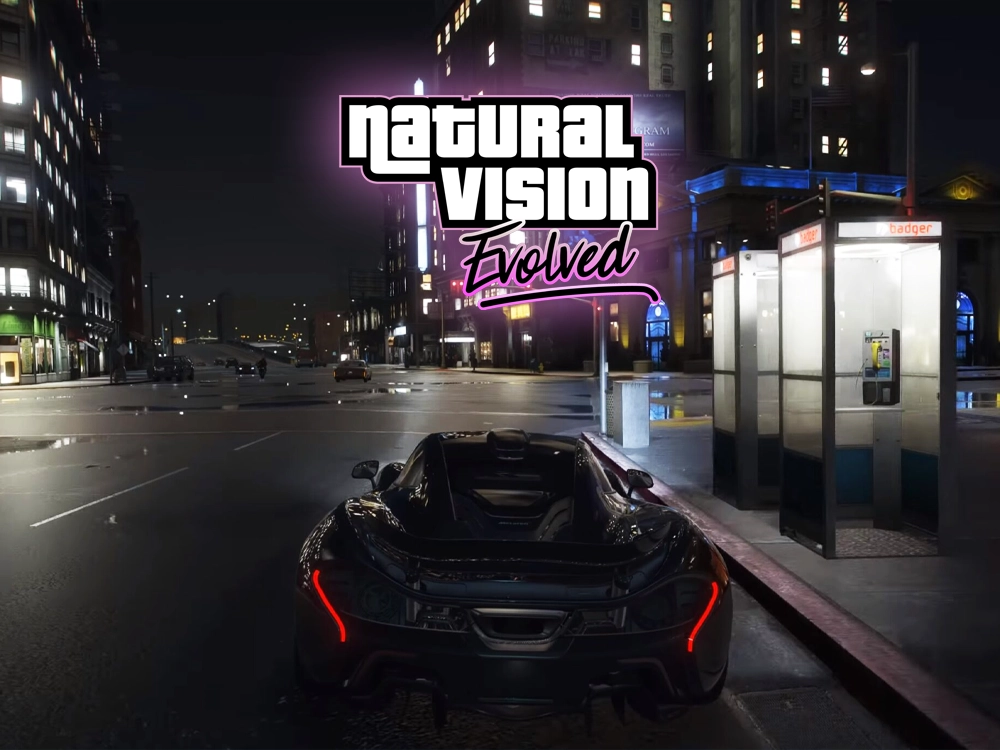
NaturalVision Evolved (NVE) is an amazing graphics mod for GTA 5 that makes Los Santos look super realistic. It improves lighting, textures, weather, and shadows, making the game feel more like real life. If you want better reflections, cool effects, and movie-like graphics, this is the perfect mod for you!
In this guide, we’ll show you how to download and install NaturalVision Evolved for GTA 5 in 2025 step by step. We’ll also make sure you have the latest updates for the smoothest experience.
Quick Navigation
- Important
- Step 1: Download Natural Vision Evolved
- Step 2: Install Natural Vision Evolved
- Natural Vision Evolved Troubleshooting
- FAQs about Natural Vision Evolved
⚠️ Important before we install Natural Vision Evolved
To install NVE, you must have OpenIV and Script Hook V. If you’re new to GTA 5 modding, set these up first to prevent game crashes or accidental bans in GTA Online.
Step 1: Download Natural Vision Evolved
Now that you’re familiar with the essentials, let’s begin with downloading and installing Natural Vision Evolved!
- Head over to the official page for NVE or click the button below:

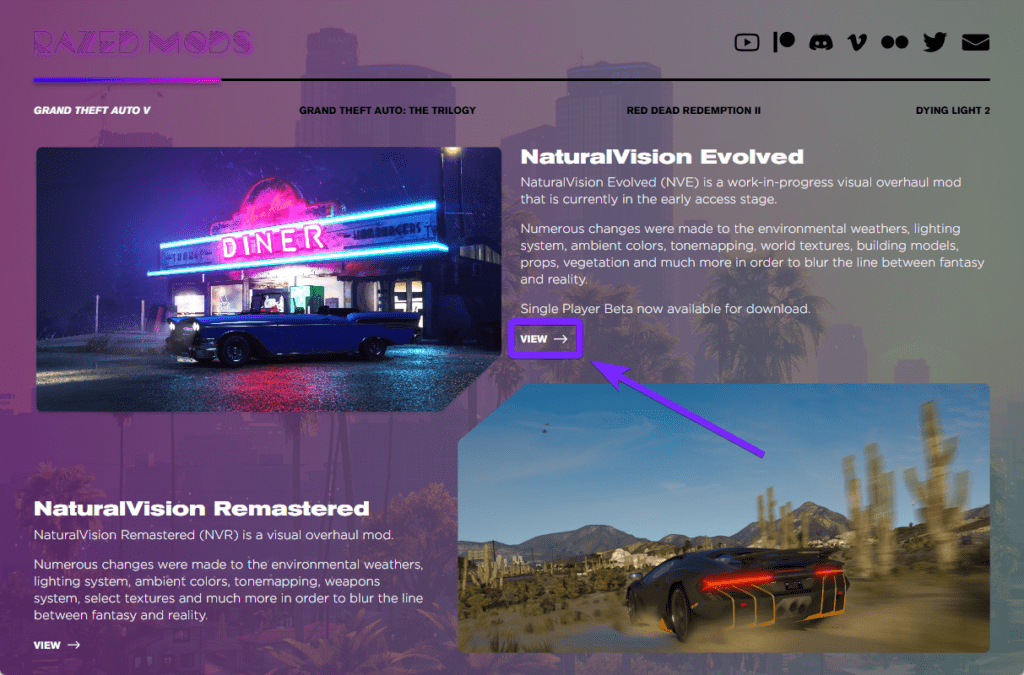
- Once on the website, select Grand Theft Auto V in the bottom left .
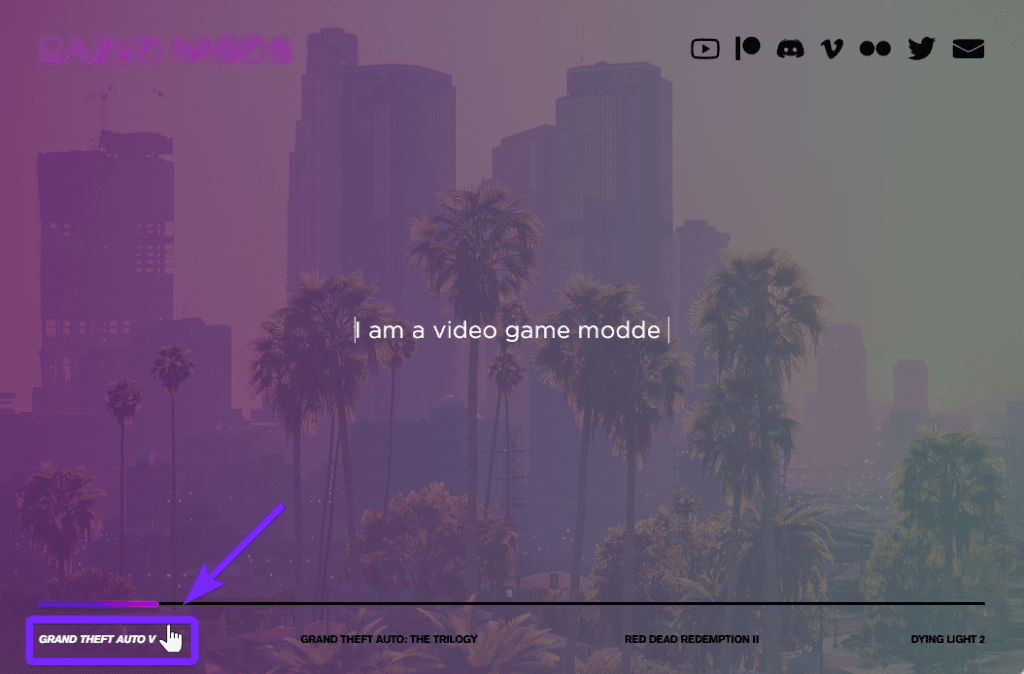
- Then click “View” next to the NaturalVision Evolved option.
- Afterward click “Free Turbo Download” and wait for it to start downloading.
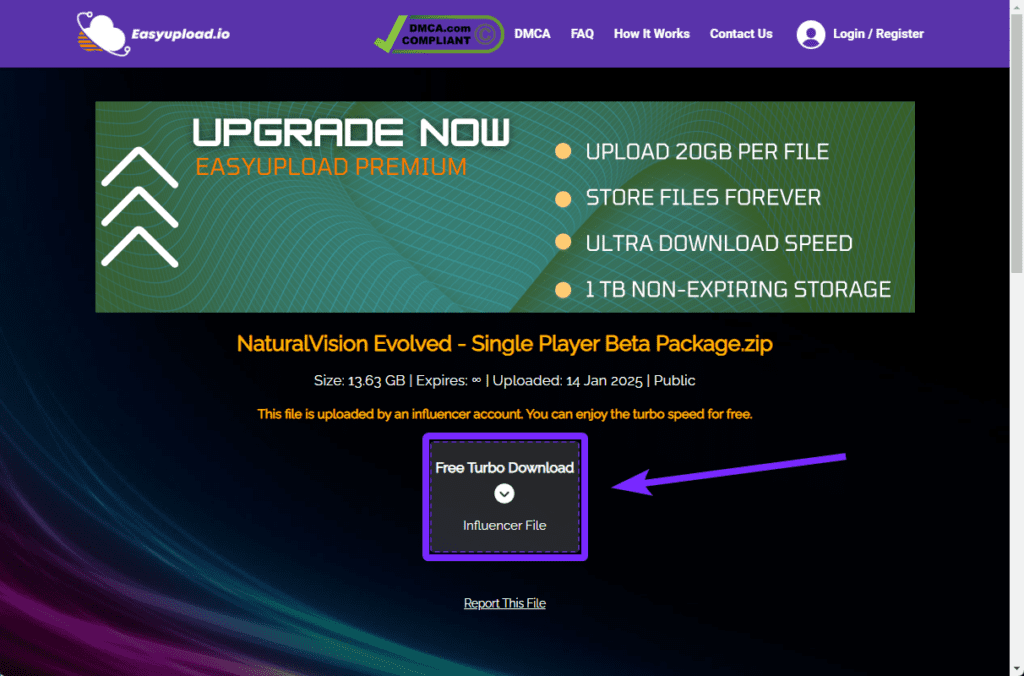
- Wait patiently for the download to finish, it’s 13.6 Gigabytes so it will take some time.
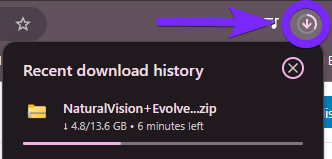
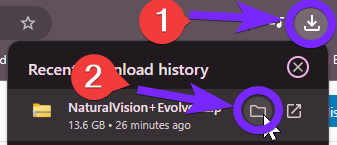
💡 TIP: You can check the process of the download in the top right corner of your browser in the “Recent Download History”
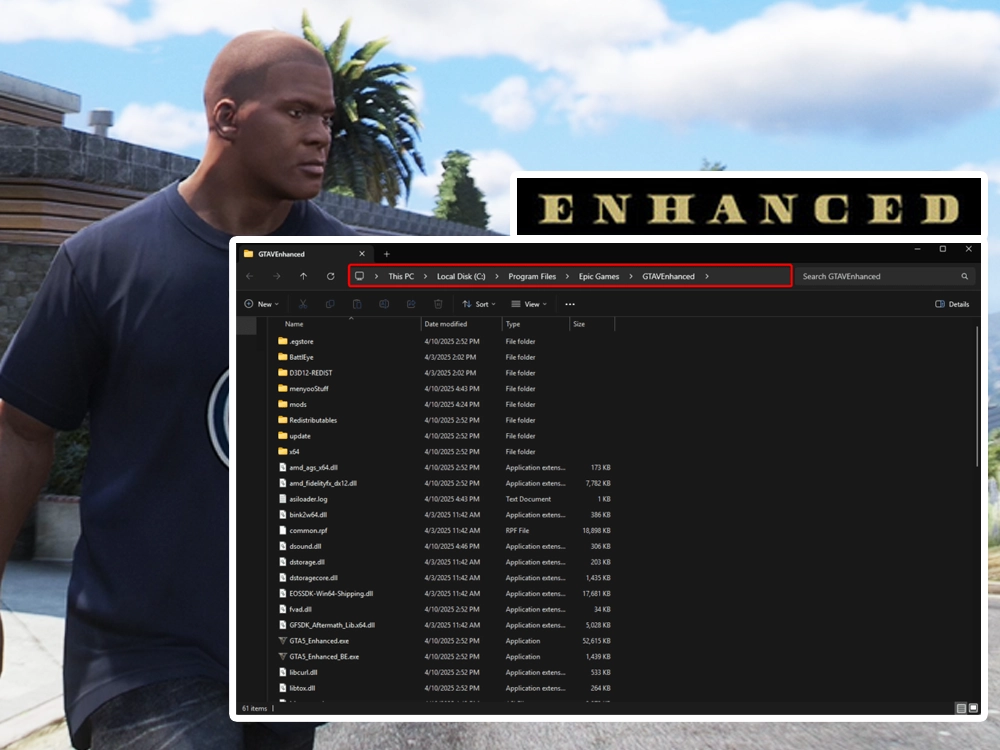
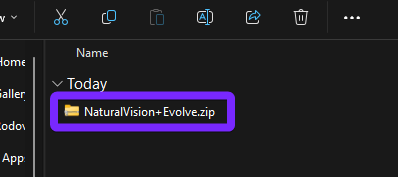
- Once it finishes downloading we are going to extract the file. Open your “Downloads” folder.
- Rename the file and delete 2 of the dots at the end, the name should look like this “NaturalVision+Evolve.zip“
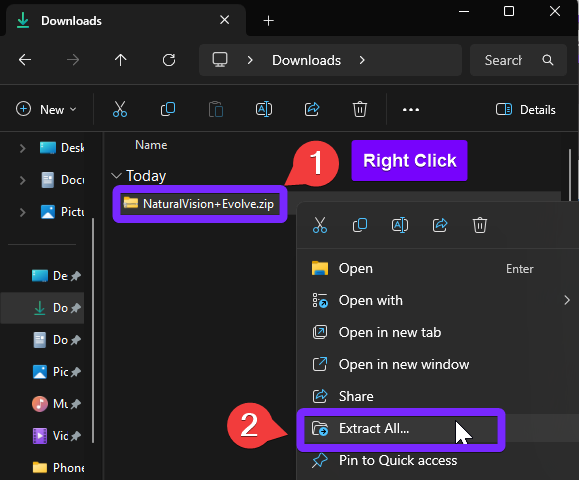
- Extract the “NaturalVision+Evolved.zip” file you just downloaded.
💡 TIP: On Windows 10 or 11 just “Right Click” and “Extract All“, but if you’re using an older operating system, you’ll need WinRAR or a similar tool to extract it.
Now we have downloaded NVE and have extracted it successfully it is time to move on to the next step to learn how to install NaturalVision Evolved.
Step 2: Install Natural Vision Evolved
Now that you’ve downloaded NVE in the previous step, let’s start installing it into the game.
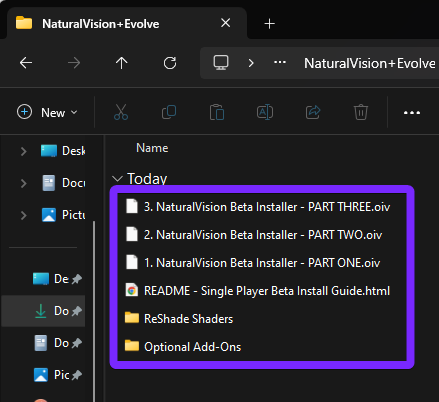
- Open the “NaturalVision+Evolved” folder.
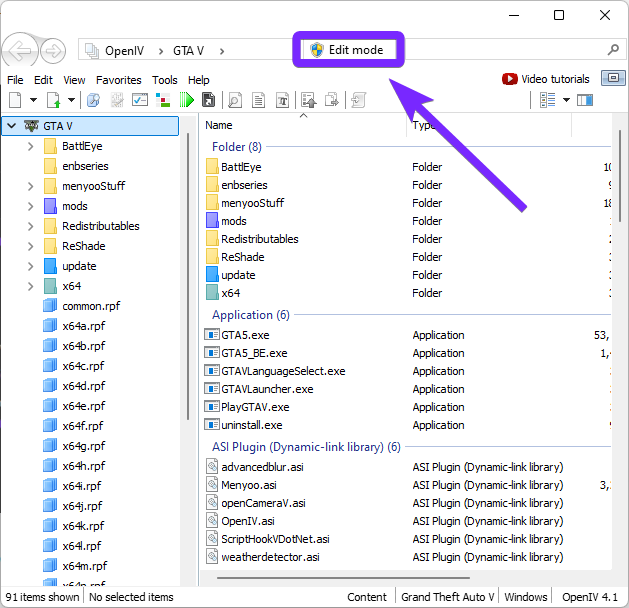
As mentioned at the start of the guide, you’ll need OpenIV for this step.
- Now Launch OpenIV and enable “Edit Mode“.
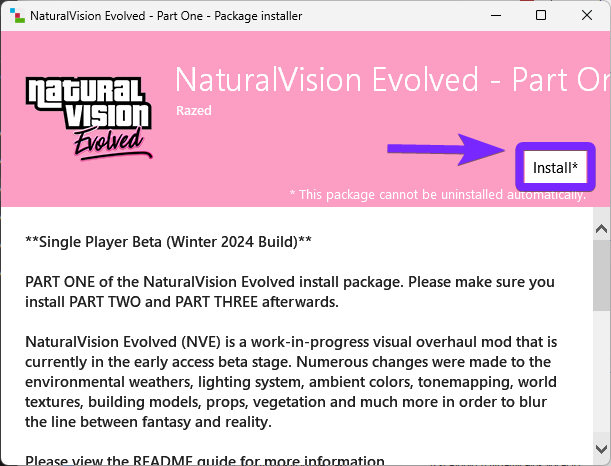
- Now Drag and Drop the “NaturalVision Beta Installer – PART ONE.oiv” file into the OpenIV interface.

- You will get the pup up window for the installation and click Install.
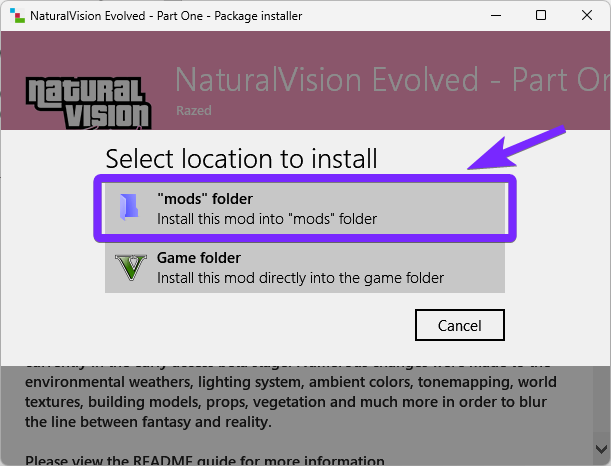
- Select “mods” folder.
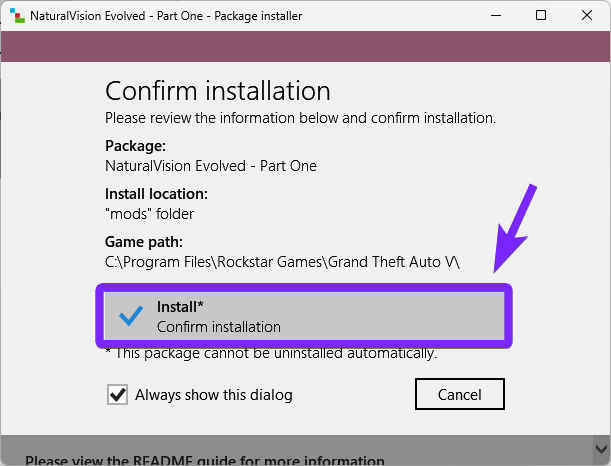
- Click “Install*” to Confirm Installation.
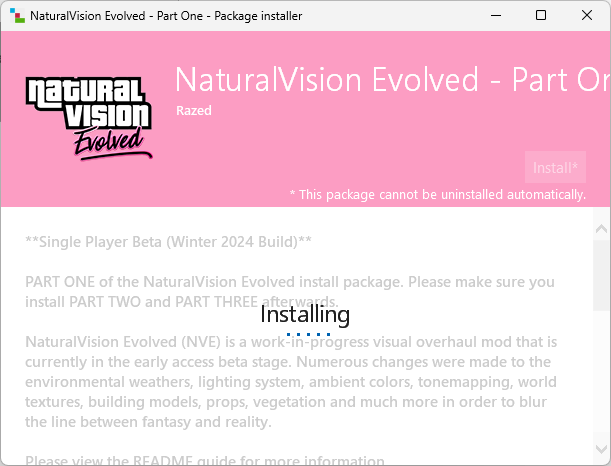
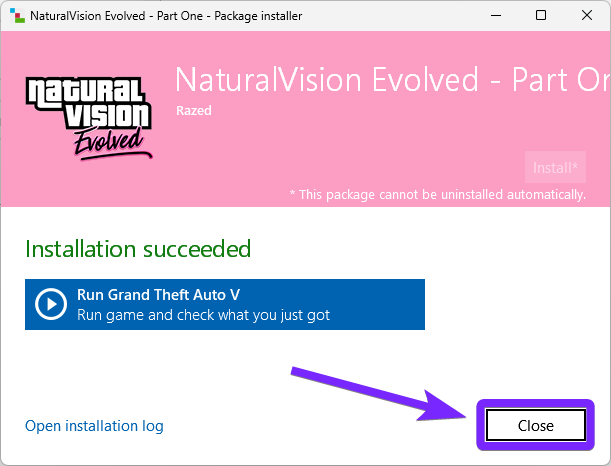
- Wait for the installation to finish, it will take some time.
- Click Close.
⚠️ Important: Now that we have Part One installed, we are going to repeat the same installation process for “NaturalVision Beta Installer – PART TWO.oiv” and “NaturalVision Beta Installer – PART THREE.oiv“.
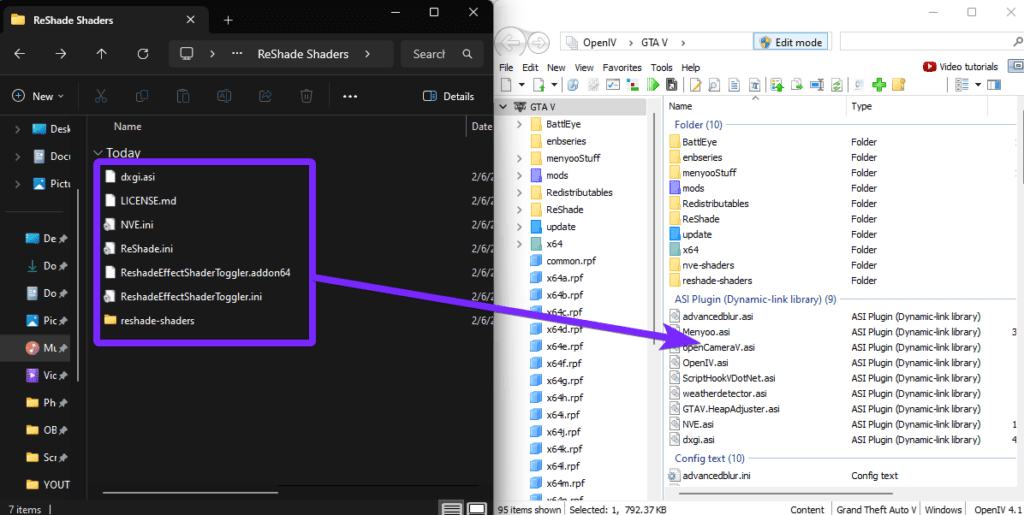
Now we are going to add ReShade shaders. (You need to have ReShade)
- Open the ReShade Shaders folder.

- Drag and drop all the files of the ReShade Shaders folder into the OpenIV interface.
Finally, NVE is installed. You can now close everything and open GTA 5 to start enjoying some nice shaders.
💡 Tip: To uninstall NVE, go into the folder we extracted earlier “Optional Add-Ons” and then “NaturalVision Uninstaller“, drag and drop it into OpenIV and click “Install“, this will restore your GTA to your vanilla settings.
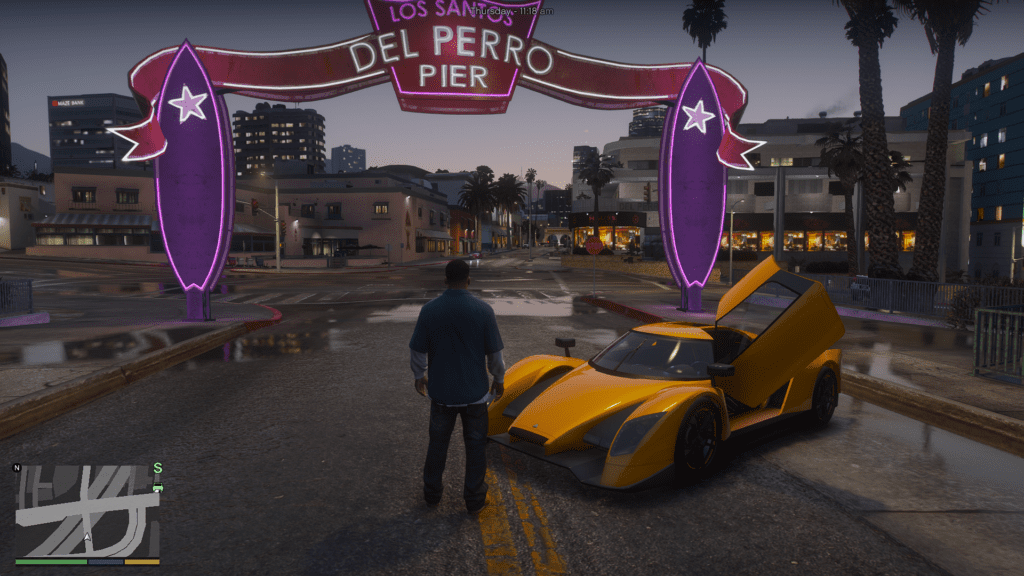
Now that you’ve installed NaturalVision Evolved for GTA 5, you’ve turned Los Santos into a stunning, ultra-realistic world! Enjoy the improved lighting, sharper reflections, and incredible weather effects. Have fun exploring—and happy modding!
Natural Vision Evolved Troubleshooting
GTA 5 Crashes After Installing NVE
If GTA 5 keeps crashing after installing NaturalVision Evolved (NVE), don’t worry—there are a few simple fixes! First, make sure your game is fully updated, as outdated versions can cause issues. Next, double-check that Script Hook V, OpenIV ASI Loader, and your mods’ folder are correctly installed. If you skipped using a mods folder and installed NVE directly into the game files, you might have accidentally overwritten something important. In that case, verify your game files through Steam, Epic Games, or Rockstar Launcher to fix any corrupted data.
Low FPS or Performance Drops
If GTA 5 is running slow or lagging after installing NaturalVision Evolved (NVE), try adjusting your graphics settings. Lowering Extended Distance Scaling, Reflection Quality, and MSAA can significantly improve performance. If available, install the Performance Edition of NVE, which is optimized for better FPS. Lastly, make sure your GPU drivers are up-to-date, as outdated drivers can cause performance issues. These steps should help you get smoother gameplay while still enjoying NVE’s stunning visuals!
NVE Shaders Not Working (ReShade Issue)
If your NaturalVision Evolved (NVE) shaders aren’t working, don’t panic! First, press Home (or Fn + Home on some laptops) to open the ReShade menu and check if the NVE shaders are loaded. If they’re missing or not applying, try reinstalling ReShade and manually placing the NVE ReShade presets in the correct folder. Also, make sure your graphics settings are properly configured—your game should be running on DirectX11, with Texture Quality set to Very High, Particle Quality set to Very High, and Post FX set to Ultra. These steps should get your shaders up and running!
FAQs about Natural Vision Evolved
Can I use NVE in GTA Online?
No! Using NaturalVision Evolved (NVE) or any other mods in GTA Online can get you banned. Rockstar has strict policies against mods in online mode, even if they only affect graphics. To stay safe, always disable your mods before launching GTA Online—the best way is to use a separate “mods” folder or a mod manager to easily switch them on and off. Play smart and avoid the risk!
Is NaturalVision Evolved free?
Partially. NaturalVision Evolved (NVE) offers a free version, but it’s an older build with fewer features. If you want the latest updates, enhanced graphics, and ongoing improvements, you’ll need to support the developers on Patreon to get access to the full version. While the free version still improves GTA 5’s visuals, the paid version includes the most advanced lighting, reflections, weather effects, and textures. If you’re serious about upgrading your game’s graphics, it might be worth the investment!
Will NVE work on low-end PCs?
Not recommended. NaturalVision Evolved (NVE) is a highly detailed graphics mod that requires a powerful PC to run smoothly. The developers recommend at least an RTX 3060 or better, 16GB of RAM, and an SSD for the best experience. If you’re using a low-end PC, you might experience severe FPS drops, stuttering, or crashes. However, you can try lowering your graphics settings or using the Performance Edition of NVE (if available) to improve performance. But for the best results, a mid to high-end gaming PC is ideal.