Getting Started with VisualV Mod: What You Need to Know
If you’re looking to enhance the graphics of Grand Theft Auto V, then VisualV is one of the best mods available. Not only does it improve lighting, reflections, shadows, but it also significantly boost the game’s overall visual fidelity, making Los Santos and Blaine County look more immersive than ever. In this step-by-step guide, you’ll learn how to download and install VisualV for GTA V in 2025, including optional customization settings and troubleshooting solutions.
Quick Navigation
- Step 1: Download the VisualV Mod
- Step 2: Install VisualV
- Step 3: Customize VisualV Graphics Options (Optional)
- VisualV Troubleshooting
- FAQs about VisualV
Step 1: Download the VisualV Mod
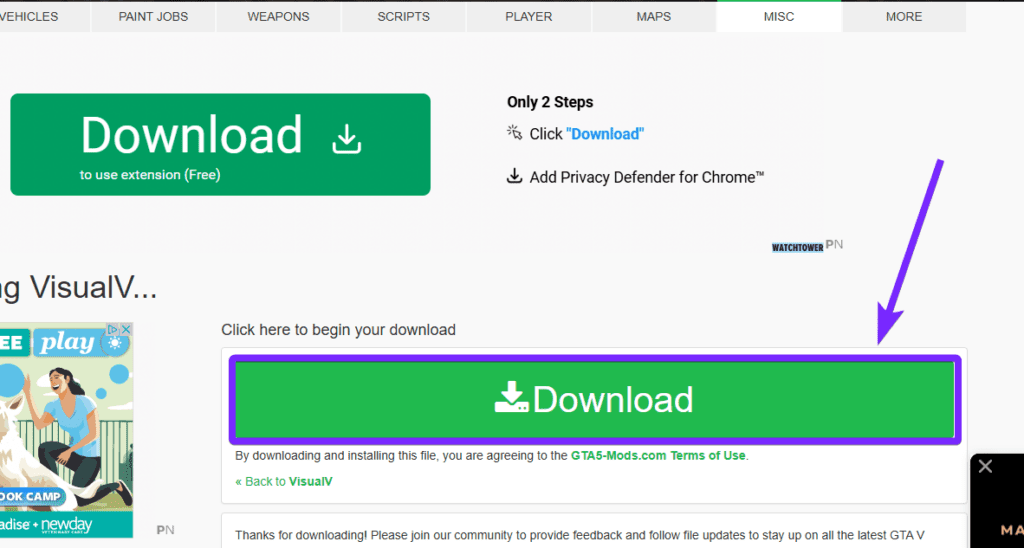
To ensure a safe and virus-free installation, download VisualV only from reputable sources like GTA5-Mods.com or click the button down below to go straight to VisualV download page.

- Once on the website, click the “Download” button for VisualV.
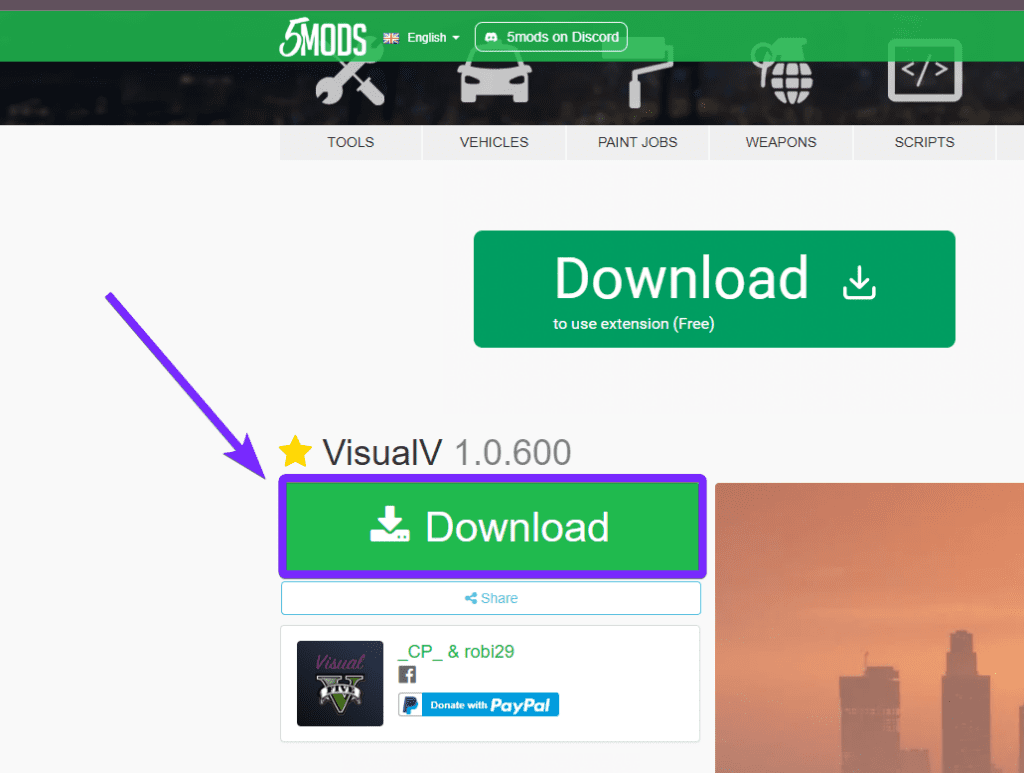
- Then, confirm the download. (Be cautious not to click on misleading ads!)
Once the download is complete, locate the file in either, your “Recent Download History” of your browser in the top right corner, or in your system’s default downloads folder 📁 on your computer.
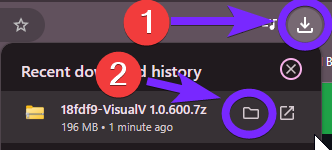
Generally, the downloaded file will be in .zip or .7z format.
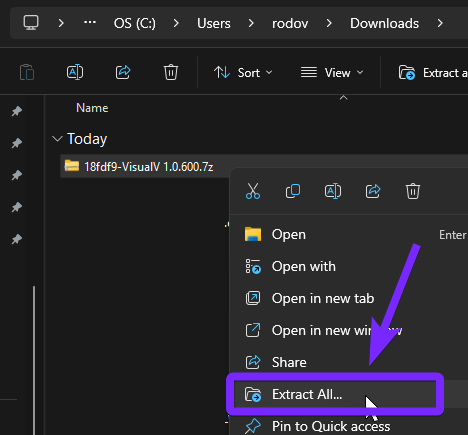
- Go ahead and extract the content of this file, if you don’t have any zip reader, you can install WinRAR here.
💡TIP: If you are using Windows 10/11, simply right-click the file and select “Extract All…”
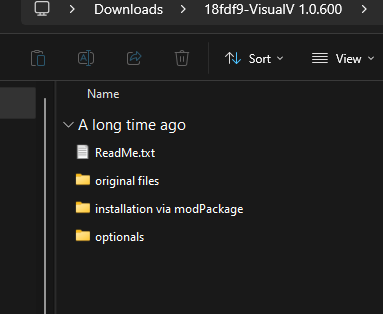
At this point, you should now have access to all the necessary files, allowing you to proceed to the next step.
Now that we have downloaded and extracted the VisualV mod into our pc, let’s move onto the next step to learn how to install Visual 5 for Grand Theft Auto 5.
Step 2: Install VisualV
After we downloaded VisualV in the previous step, we are going to proceed with the installation process.
To install VisualV, you’ll need OpenIV installed, this is a modding tool for GTA 5. Therefore, if you don’t have it yet, click here to learn how to install OpenIV.
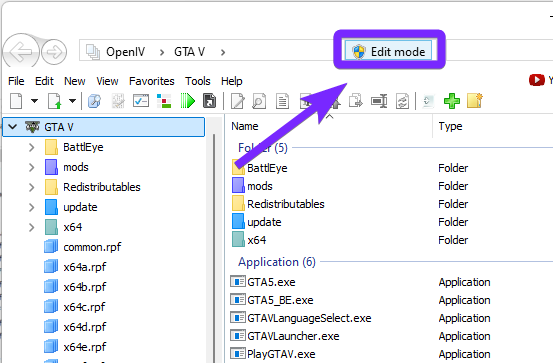
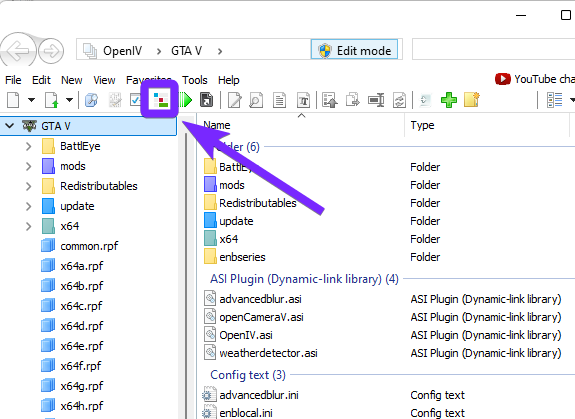
- Launch OpenIV and click “Edit Mode” (Top right corner in OpenIV).
- Click the “Package Installer” icon
 in OpenIV and a new window will open.

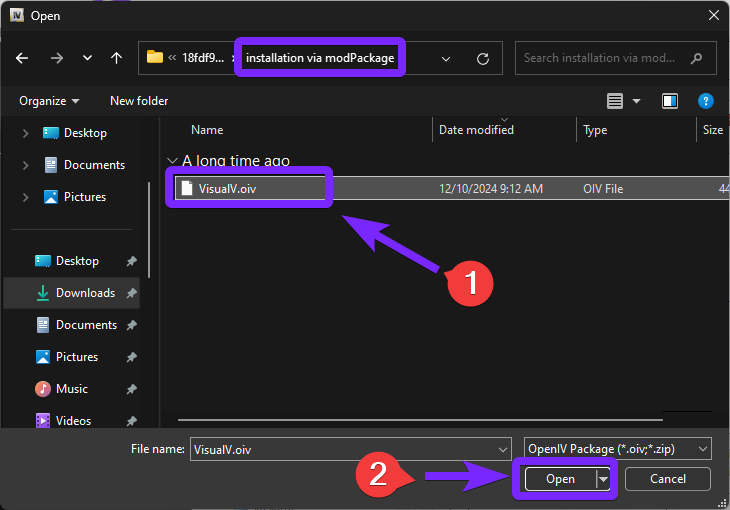
- Locate the previously extracted VisualV folder from the first step and open the “installation via modPackage” folder. Then, select “VisualV.oiv” and click “Open“
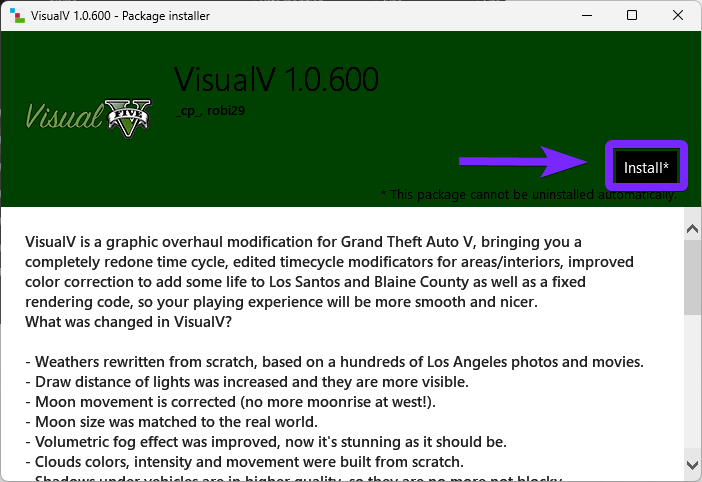
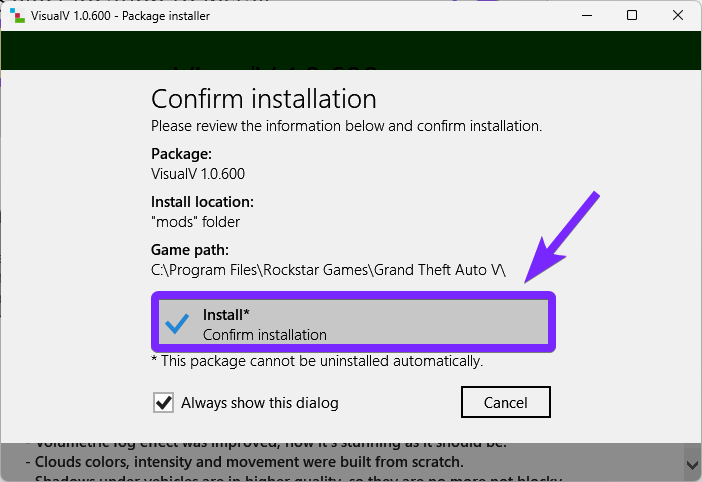
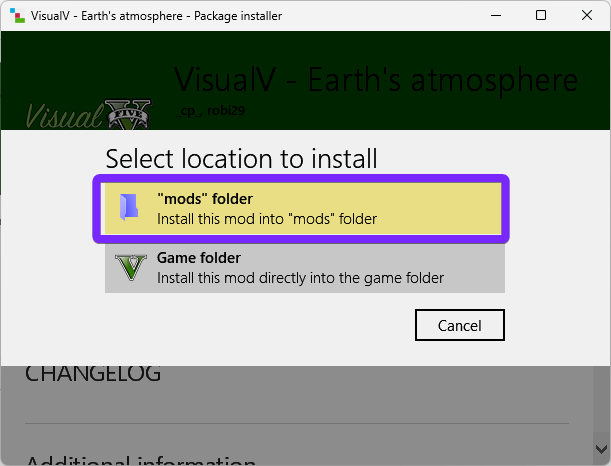
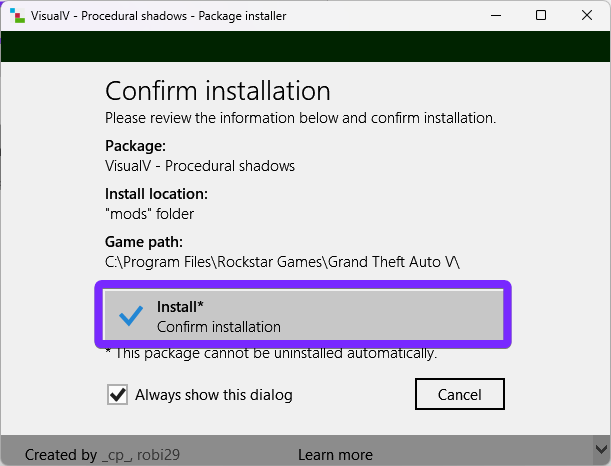
- You will get a brief summary of what you are installing, then click “Install”.
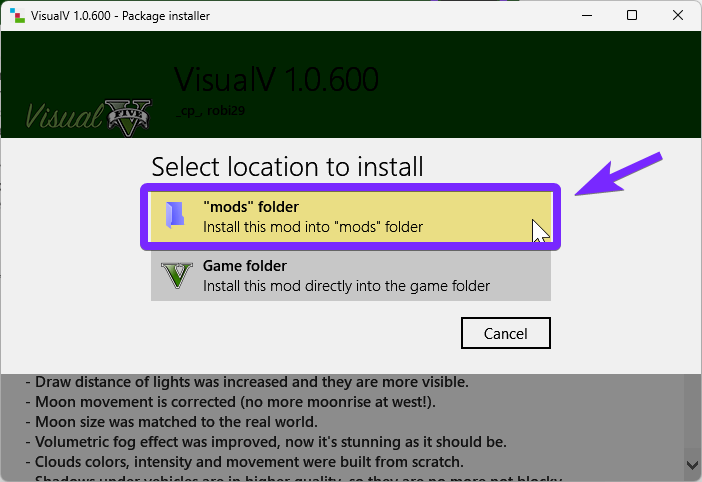
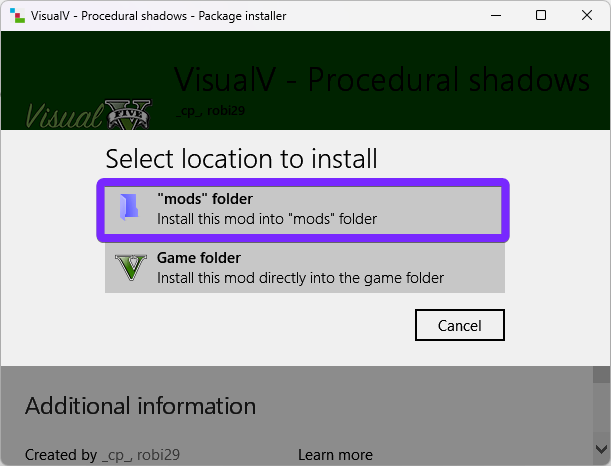
- Choose “mods folder”, this way we don’t affect the original installation of GTA 5 and can always revert the changes.
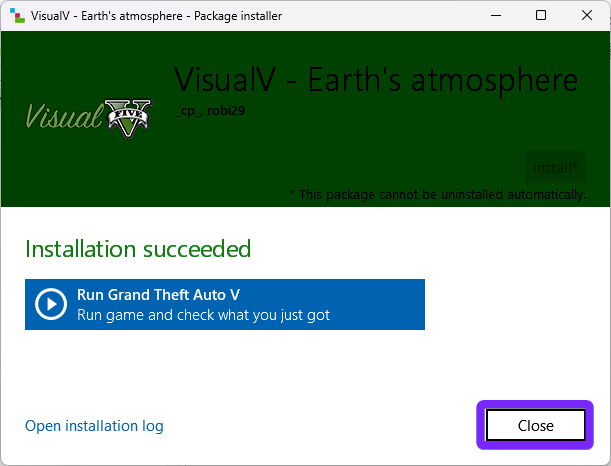
- Then, click “Install” again and wait for the installation to complete.
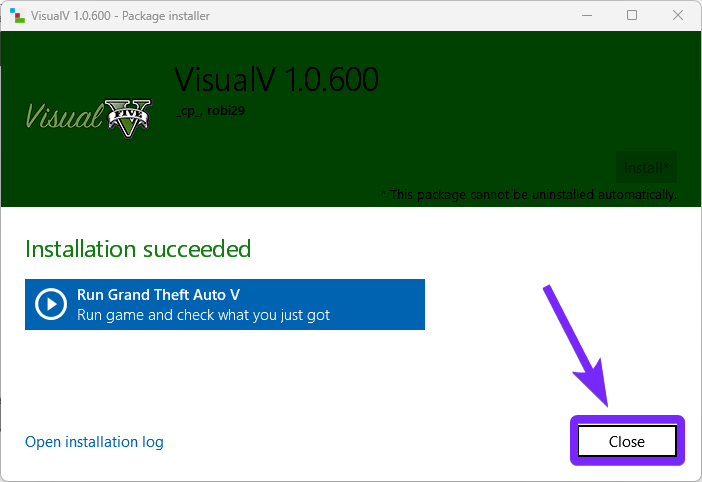
- Finally, click “Close” to finish the process.
Now you have VisualV installed,in order to unlock all the advanced graphical features, continue to next step to learn how to customize VisualV.
Step 3: Customize VisualV Graphics Options (Optional)
To make the graphics even better, VisualV includes some extra add-ons. But you don’t have to install all of them. Instead, you can pick the ones that work best for you and your computer.
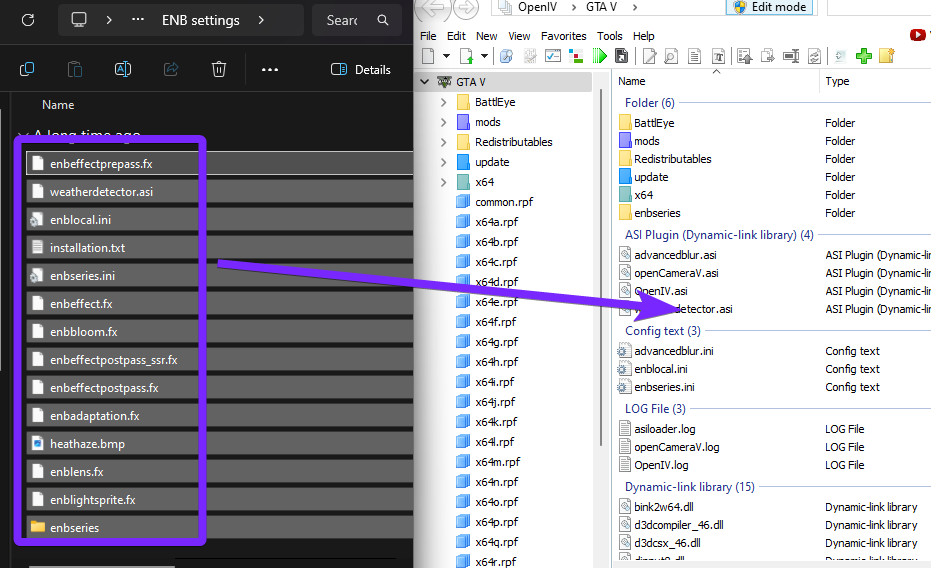
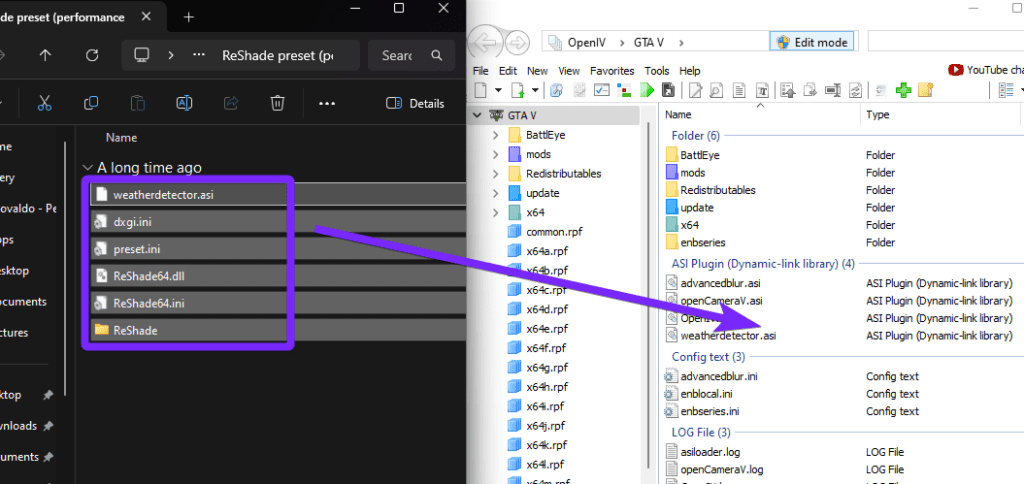
Open side by side the folder we extracted earlier and OpenIV on split screen to make the process easier. (See image below for reference)
- Make sure to have “Edit Mode” selected.
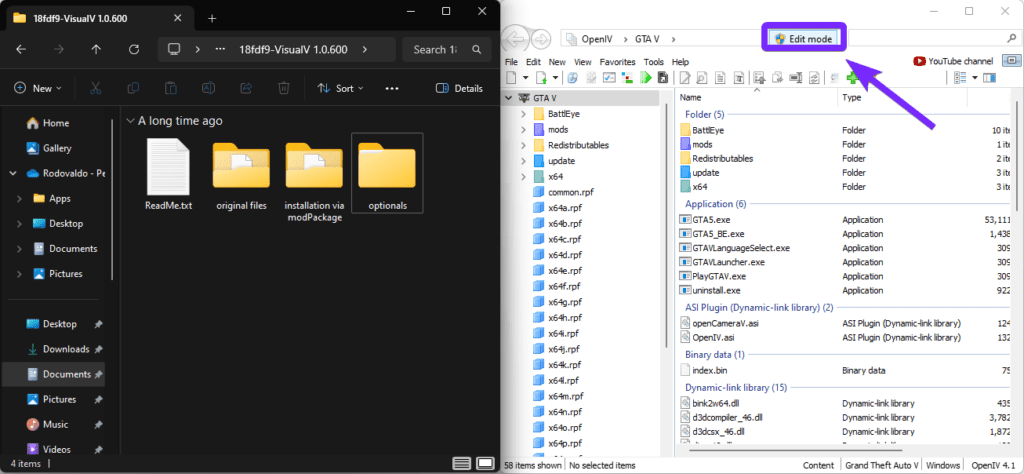
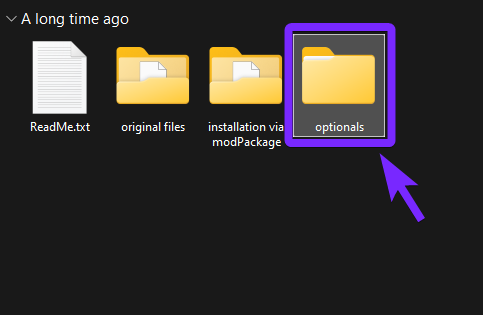
- Now open the “optionals” folder within the VisualV extracted file.
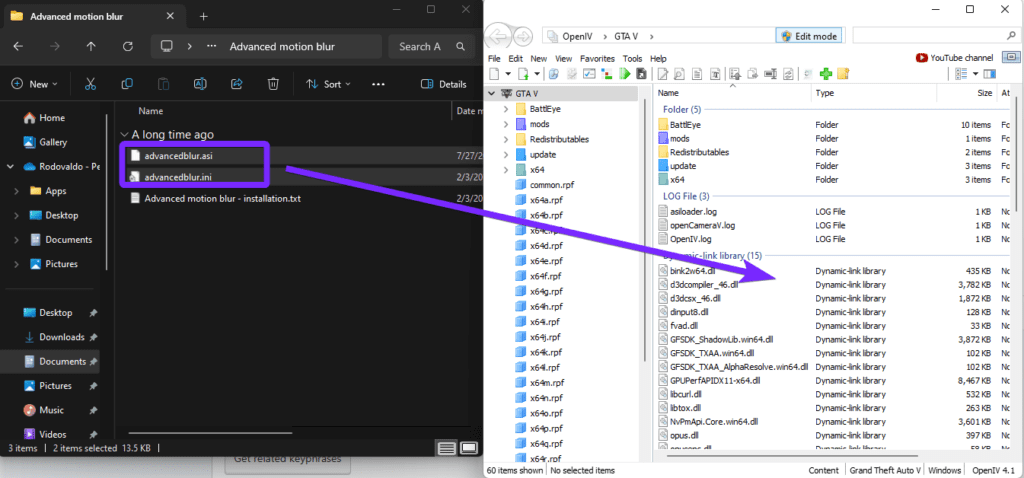
- In here you will see multiple folders, open them in alphabetical order, starting with “Advanced motion blur”.

- Once in the folder, drag and drop the “advancedblur.asi” and “advancedblur.ini” files into the OpenIV interface, like the image below.
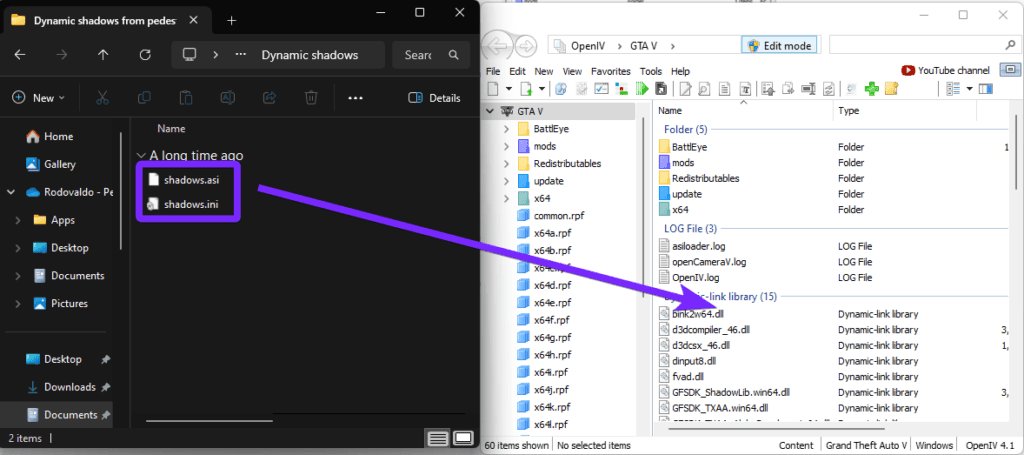
- Now go to the next folder named “Dynamic shadows from pedestrian vehicles” and drag the content into the OpenIV launcher.

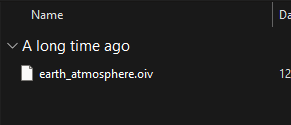
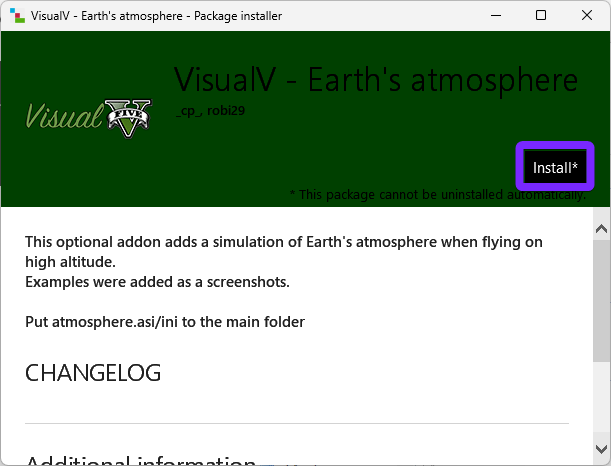
- Head over to the Earth’s atmosphere folder and click the earth_atmosphere.oiv file.
Follow the steps below to complete the Earth’s atmosphere installation.

⚠️ Important: I had an error while installing the Earth’s atmosphere, as shown below.
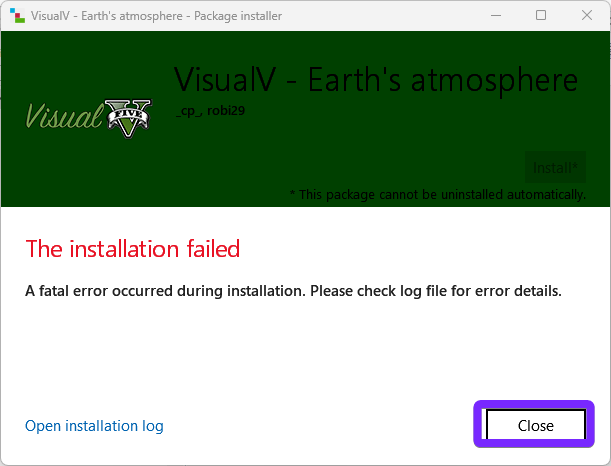
The solution is to this common error is the following:
- Open the Task Manager and go to Process.
- Look for GTA V or Rockstart Games and Right Click on each of them and Close Task.
That should get rid of the installation failed problem.
- Next we will install the ENB settings, head over to that folder, and drag everything into the OpenIV launcher.
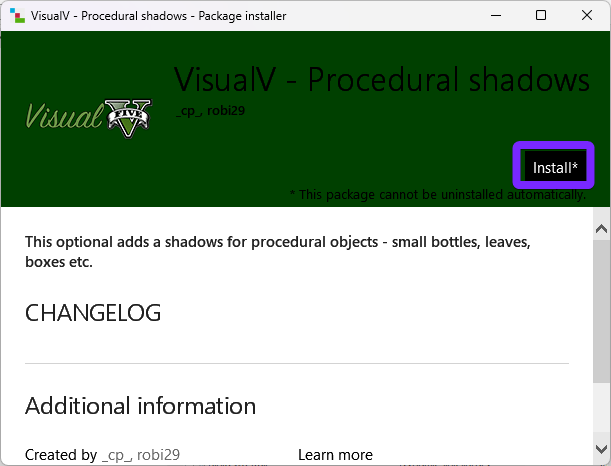
At this moment it is time to add the Procedural shadows, Since it’s an “.oiv” we have to install it using the “Package Installer“.
- Now, we will click the “Open Package Installer” within OpenV
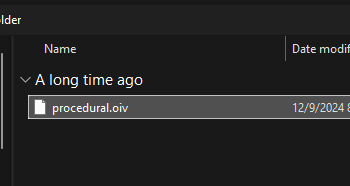
- Next, select the procedural.oiv file.
- Now follow the installation steps below.

- Next, we are going to install the grass.oiv, we need to use the Open Package Installer within OpenIV.
- Next, select the grass.oiv file and click open.
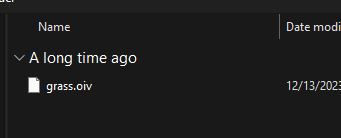
Follow the installation process for grass.oiv.
Lastly, we are going to add the Reshade preset, this might cause some performance loss, but it will definitely improve the looks of your game. You can also install ReShade using this link.
- To add the Reshade preset, just open the ReShade folder and drop all the files into the OpenIV interface.
Great job! Now you know how to download and install VisualV for GTA V in 2025! This mod makes the game look better by improving the lighting, weather, and graphics. It also has extra add-ons, but you don’t have to use all of them—just pick the ones that work best for your computer.
If you had any trouble installing VisualV, don’t worry! The next section will help you fix common problems so you can get it working smoothly.
VisualV Troubleshooting
Sudden Lighting Changes in Rockstar Editor
Users have reported abrupt lighting shifts when viewing bright areas or the sun within the Rockstar Editor. This issue can be addressed by adjusting specific parameters in the visualsettings.dat file. Setting [Adaptation.min.step.size] to 0, [Adaptation.max.step.size] to 1 or less, and [Adaptation.step.size.mult] to 0.0 has been found to resolve the problem.
Compatibility Issues with Other Mods
Conflicts may arise when VisualV is used alongside other graphics mods, such as NaturalVision. These conflicts can lead to unintended visual effects or performance issues. To mitigate this, ensure that all mods are compatible and properly configured. Consult the documentation of each mod for guidance on compatibility.
Dim or Weak Vehicle Headlights
Some players notice that vehicle headlights appear too dim after installing VisualV. This can be corrected by adjusting the radiance settings in visualsettings.dat or using an optional radiance overhaul included with VisualV. Ensuring that brightness settings in the game’s graphics menu are properly configured can also help improve visibility.
FAQs about VisualV
What is VisualV?
VisualV is a graphic overhaul modification for Grand Theft Auto V that offers a completely redone time cycle, edited timecycle modifiers for various areas/interiors, and numerous visual improvements to enhance the game’s graphics.
How do I install VisualV?
To install VisualV, you’ll need to use OpenIV, a modding tool for GTA V. After downloading VisualV, extract the files and use OpenIV’s package installer to install the “VisualV.oiv” package. Detailed installation instructions are often provided in the mod’s documentation or can be found in community guides.
Is VisualV compatible with other mods?
VisualV is compatible with many mods, but conflicts can occur, especially with other graphics modifications like NaturalVision or R☆hancer Photorealism Mod. It’s essential to check the compatibility notes provided by the mod authors and the community. Always back up your game files before installing new mods to prevent potential issues.