Want to host your own Minecraft server for free? This step-by-step guide will show you exactly how to set up a localhost Minecraft server for Java Edition on your computer. Hosting your own server allows you to customize your Minecraft experience, play with friends, and explore your favorite worlds without needing third-party hosting.
Whether you’re a beginner or looking for a cost-effective way to run a server, this tutorial will guide you through everything you need to know. Let’s get started on creating your very own Minecraft Java Edition server for free!
Quick Navigation
- Why Host a Local Minecraft Server
- Step 1: Install the Latest Version of Java
- Step 2: Download the Minecraft Server File
- Step 3: Start the Server Installation
- Step 4: Configure Your Minecraft Server Settings
- Step 5: Start and Test Your Minecraft Server
- Step 6: Port Forward Your Server
- Conclusion
- Troubleshooting
- Minecraft Java Server FAQs
Why Host a Local Minecraft Server
A localhost Minecraft server for Java Edition gives you complete control over game settings, mods, and privacy. It’s a free and private solution, perfect for playing with friends or testing custom configurations. Plus, hosting your own server is an excellent way to learn about Minecraft server setup and management. However, there are some risks when running your own server, such as security vulnerabilities and performance limitations. For a simpler, reliable solution, consider Apex Hosting for professional server hosting.
Requirements
- A computer with a stable internet connection
- At least 1GB of free RAM (more is recommended for better performance)
Step 1: Install the Latest Version of Java
If you haven’t updated Java lately, this is the moment to do so, we have an article on How to Install Java 21 you can read. However, here is a simple way to update or install Java.
Check if Java is Installed
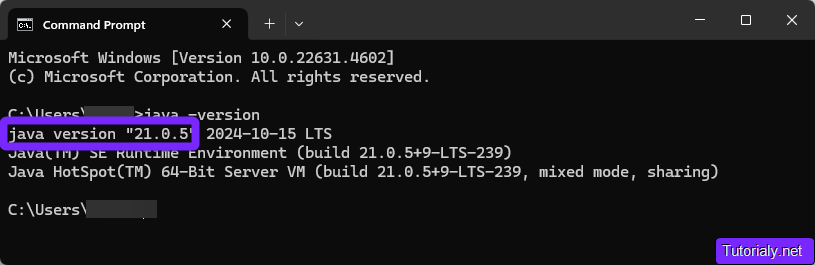
- Open a terminal (Mac/Linux) or Command Prompt (Windows). Type java -version and press Enter.
java -version- If Java is installed, it will display the version number.
- If you see an error or no version is displayed, Java is not installed, or you need an update.
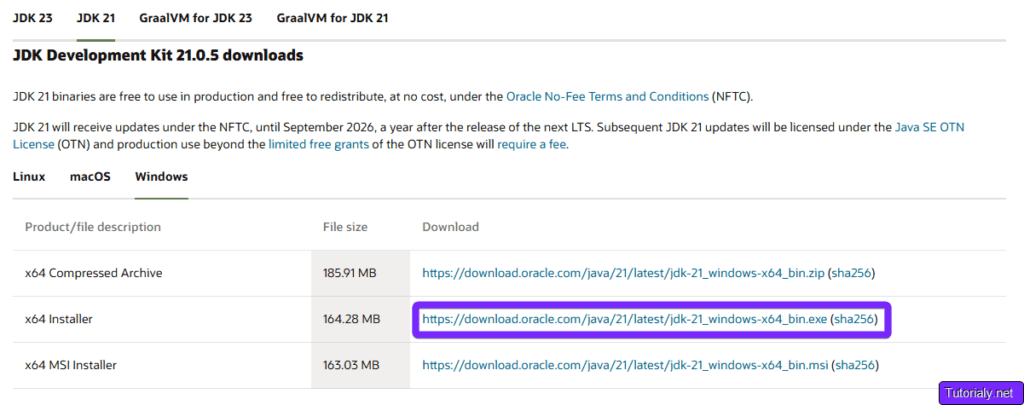
Download the Latest Version of Java
- Visit the official Java download page.
- Click the Download Java button for your operating system (Windows, macOS, or Linux).
Install Java
Run the downloaded installer.
- On Windows: Double-click the installer file and follow the on-screen instructions.
- On macOS: Open the
.dmgfile, drag Java into the Applications folder, and follow any prompts. - On Linux: Install Java using your distribution’s package manager (e.g.,
sudo apt install default-jdkfor Ubuntu).
Complete the installation process.
Verify the Installation
- Open Command Prompt (Windows) or Terminal (Mac/Linux).
- Type
java -versionand press Enter. - Ensure the version displayed matches the latest version you downloaded.
If the previous steps didn’t get Java working for you, check out our article on How to Install Java 21.
Let’s begin with the setting up of the server.
Step 2: Download the Minecraft Server File
After you install or update Java on your machine, it is time to create your server. Setting up your own Minecraft server starts with downloading the official server software.
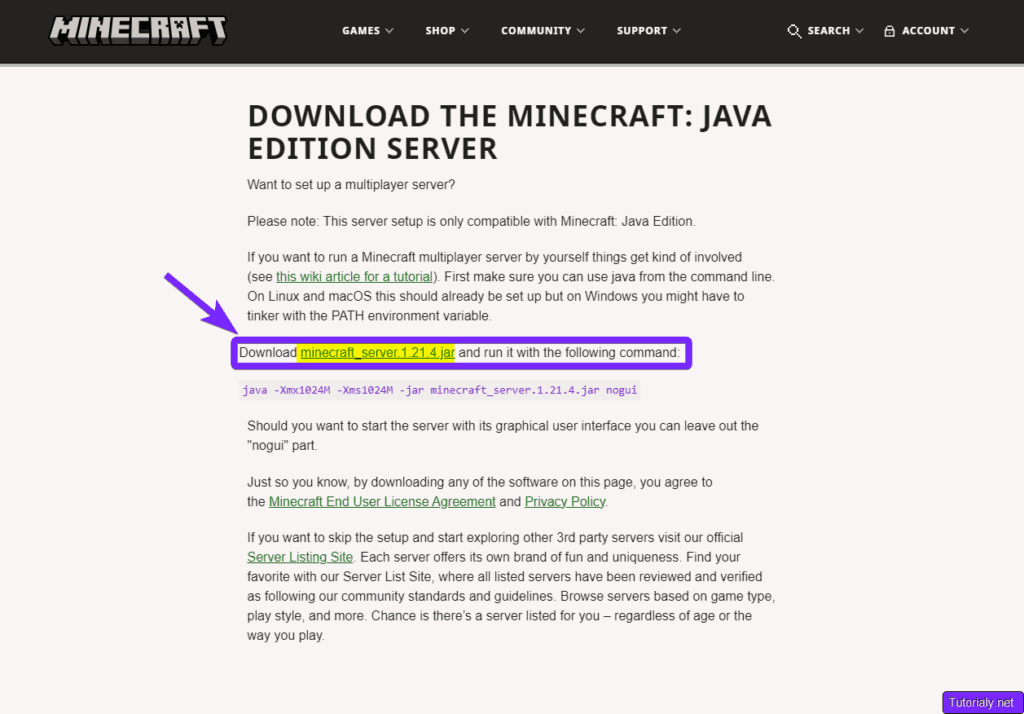
- Head over to the Minecraft Java Edition Server page, or click the button below:

- Click the underlined minecraft_server.jar to begin the server installation file download.
Once the file has downloaded, choose a location on your computer where you want to store your Minecraft server files.
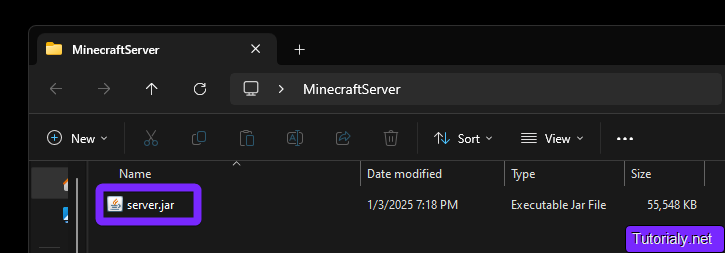
- Create a new folder and name it something descriptive, like
MinecraftServerorMyLocalServer. (The name is up to you) - Move the server.jar file you downloaded, into this new folder.
Step 3: Start the Server Installation
After downloading the server.jar file, it is time to begin the server creation.
- Double-click the server.jar file to begin the server files extraction. If you have issues with this step double-check that your Java instance is up-to-date.
The server extraction will stop once the eula.txt file is created.
- Open the eula.txt document with a text editor.
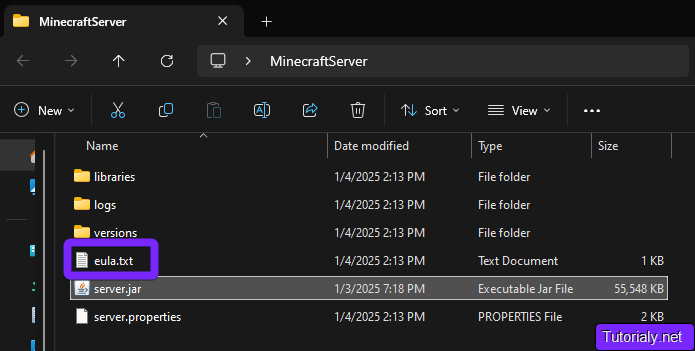
- Change eula=false to eula=true and save changes.
Tip: You can read more about the EULA here.

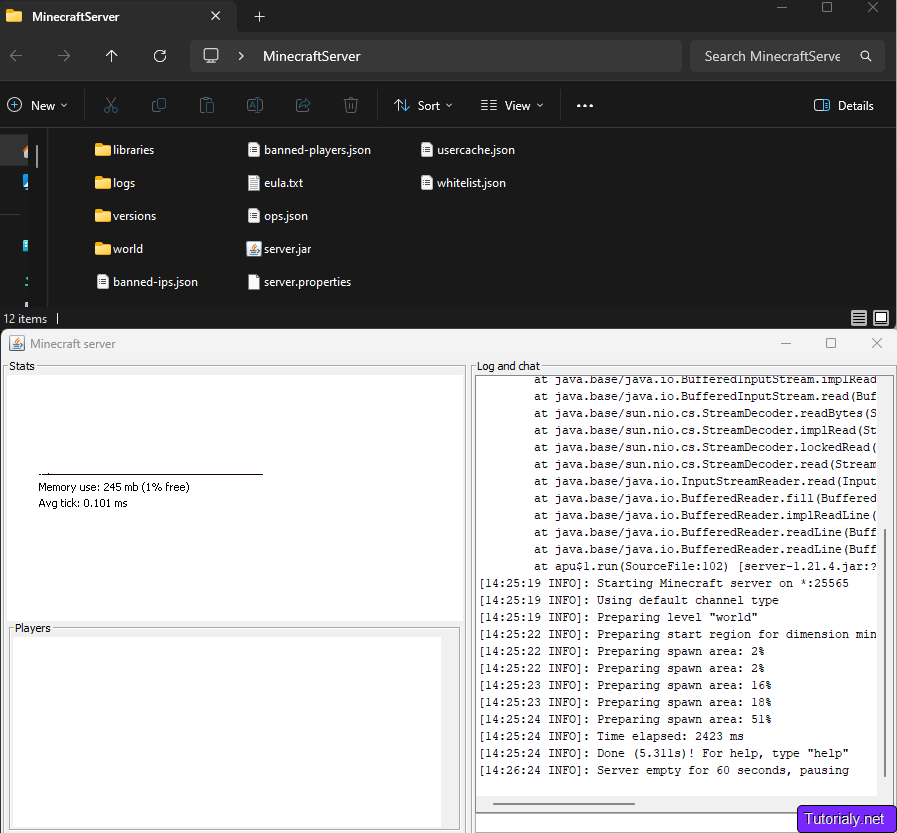
- Double-click the server.jar file again. This time all the server files will extract, and the server console will open.
- Close the server by typing stop into the console.
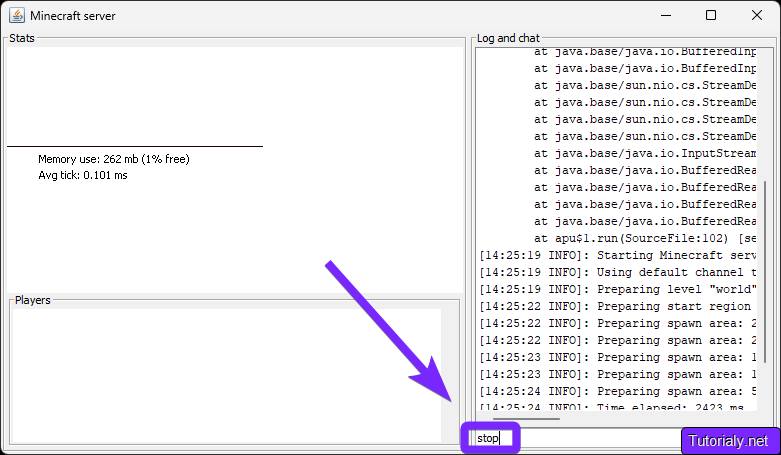
Move on to the next step to set up your server and have your friends join you.
Step 4: Configure Your Minecraft Server Settings
You have created your first Minecraft Java server, but you are not done yet. Right now your server is locally hosted and only you can join. It is time to configure your server properly, increase the Ram, change the settings of your world and have your friends join.
Adding more RAM
The first step in configuring your Minecraft server is increasing its RAM allocation. By default, Minecraft Java servers are set to use only 1 GB of RAM, which can lead to performance issues when multiple players join or when hosting larger worlds. Increasing the RAM ensures smoother gameplay and better server performance.
- Open the server folder, right-click inside the folder, select New, and then click Text Document.

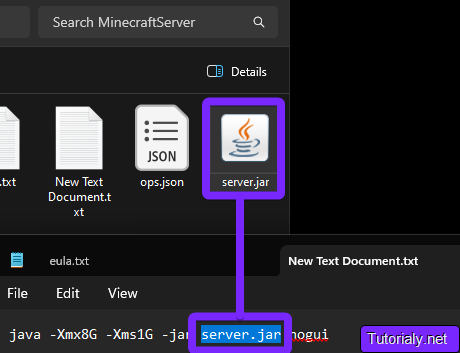
- Open the text document, and you’ll need to paste specific commands into your new text file to customize your server’s RAM allocation. Here’s how:
- Copy and paste one of the following lines into your text file. These commands determine how much RAM your server will use:
Recommendation: Do not allocate more than half of your computer’s available RAM to avoid affecting system performance.
How to check my available RAM?
Windows: Press Ctrl + Shift + Esc to open Task Manager, then go to the Performance tab and look for your total RAM under Memory.
Mac: Open Activity Monitor, click the Memory tab, and check the Physical Memory section.
1 GB RAM server
java -Xmx1G -Xms1G -jar server.jar nogui 2 GB RAM server
java -Xmx2G -Xms1G -jar server.jar nogui 4 GB RAM server
java -Xmx4G -Xms1G -jar server.jar nogui 8 GB RAM server
java -Xmx8G -Xms1G -jar server.jar nogui If you want to use more RAM than the ones above, simply replace the number in the -Xmx””G- for the amount of ram you want to use.
- After you paste the line into the text document, make sure the
server.jarin your command matches the name of the server file you downloaded (e.g.,server.jar), and update the command if needed.
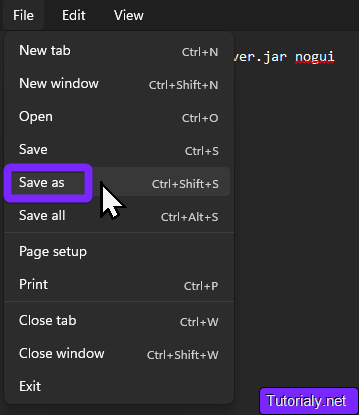
- Next, click File and Save As. (Ctrl+Shift+S)
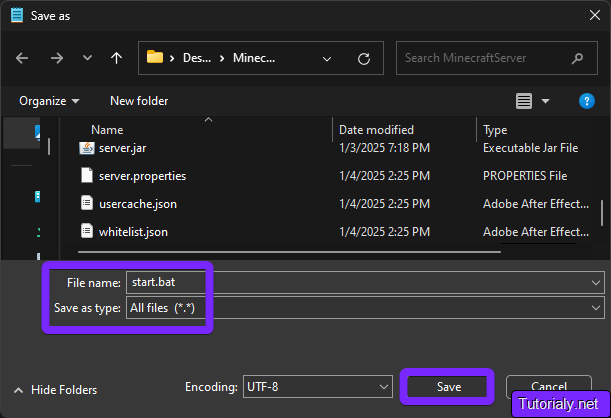
- Type start.bat as the File name, and select All files (*.*) for the Save as type, then click Save.
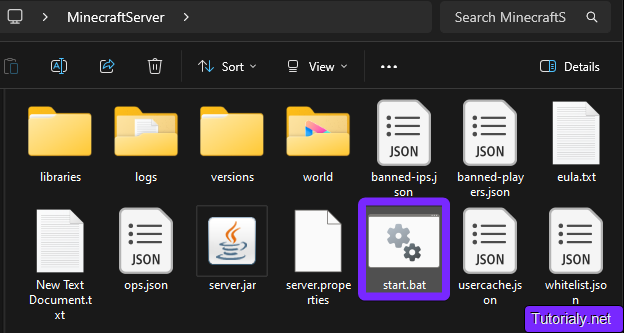
This new start.bat file is the one we are going to be using to launch our server from now on.
Next, let’s customize your server by editing the server.properties file to configure settings like game mode, difficulty, and player limits.
Edit the Server Properties File
The server.properties file (located inside the server folder) lets you customize key settings for your Minecraft server, such as game mode, difficulty, and player limits. Editing this file helps you tailor the server to your preferences.
- Right-click the
server.propertiesand open it with a text editor.

In this document we will be able to set up our server and world settings as we like.
There are some key server settings to look at:
gamemode: Set the default game mode (survival,creative,adventure,spectator). Example:gamemode=survival.difficulty: Choose game difficulty (peaceful,easy,normal,hard). Example:difficulty=normal.max-players: Limit how many players can join. Example:max-players=10.pvp: Enable or disable player vs. player combat. Example:pvp=true.motd: Add a custom message for players. Example:motd=Welcome to my server!.spawn-monsters: Toggle monster spawning. Example:spawn-monsters=true.allow-nether: Allow or block access to the Nether. Example:allow-nether=true.
Feel free to tweak these settings to customize your server and create the perfect experience for you and your friends!
Step 5: Start and Test Your Minecraft Server
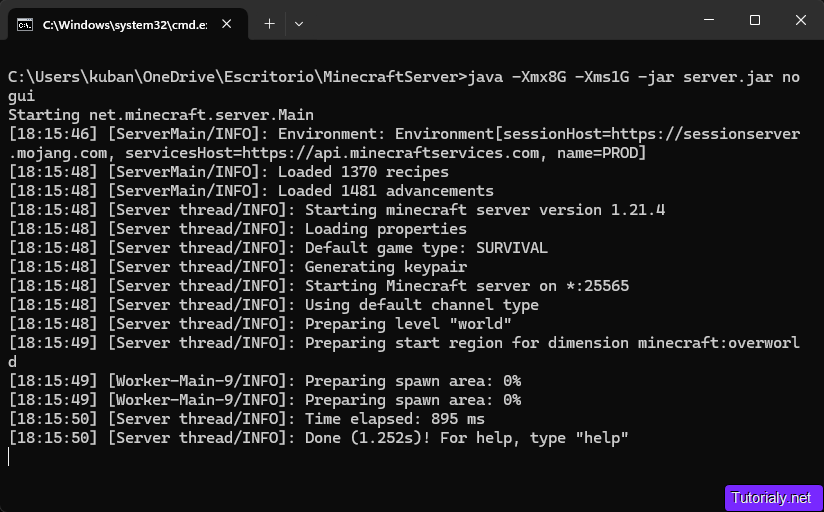
- Launch the server using the start.bat file we created earlier.
This is the new console that we are going to be using to input commands into our server.
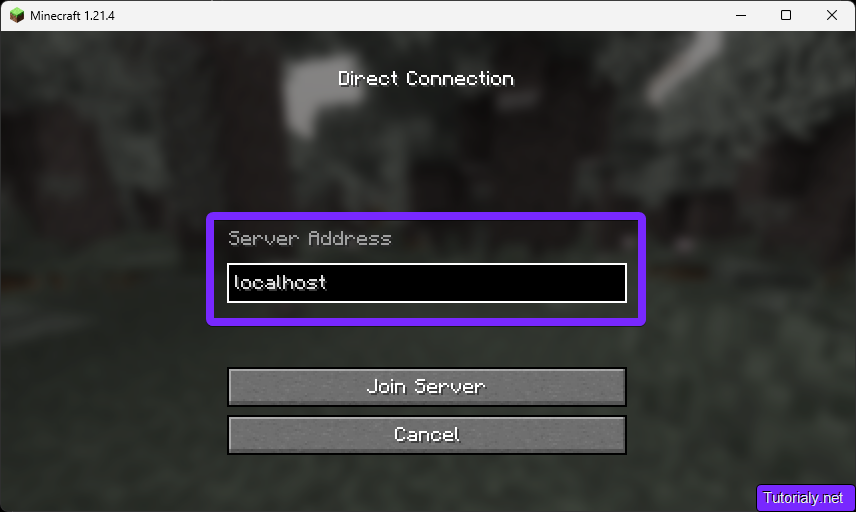
- Test the server locally by connecting to it using the
localhostaddress.
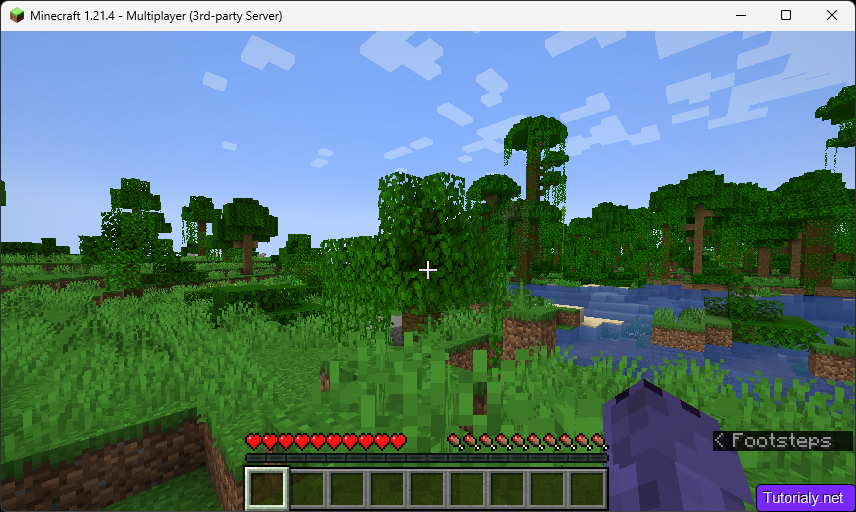
Once you’ve confirmed that your server is running and joinable, it’s time to invite your friends! Let’s move on to the next step: Port Forwarding Your Server.
Step 6: Port Forward Your Server
Port forwarding is essential if you want players outside your local network to join your Minecraft server. This step allows your server to accept connections from other players over the internet.
To allow friends to join your Minecraft server from outside your local network, you’ll need to set up port forwarding. This process involves configuring your router to open port 25565, enabling external connections to your server.
If you’re new to port forwarding or need detailed instructions, check out our complete guide on How to Port Forward Your Minecraft Server. It covers everything you need to get your server accessible to friends!
After port-forwarding, that is it, you will be ready to have your friends join you in no time.
Conclusion
Congratulations! By following this guide, you’ve successfully set up your very own Minecraft Java Edition server. Whether you’re playing with friends, customizing your world, or hosting a unique gaming experience, your server is now ready for action. As you explore, don’t hesitate to tweak your settings, experiment with mods or plugins, and make your server truly your own.
If you want to make your server accessible to friends online, remember to follow our Port Forwarding Guide.
Troubleshooting
Server Won’t Start
- Ensure you’ve accepted the EULA in
eula.txt. - Check that your
start.batfile references the correctserver.jarfilename.
Can’t Connect to Server
- Make sure the server is running and you’re connecting to
localhostfor local testing. - For external connections, confirm that port forwarding is configured correctly.
Lag or Performance Issues
- Allocate more RAM to the server in your
start.batfile. - Reduce
view-distancein theserver.propertiesfile to lower the load on your server.
Minecraft Java Server FAQs
How do I connect to my server locally?
Use localhost as the server address when connecting from the same computer or device hosting the server.
Why isn’t my server running smoothly?
Performance issues may be caused by insufficient RAM. Make sure to allocate more RAM in your start.bat file and lower settings like view-distance in the server.properties file.
How do I customize my server settings?
Edit the server.properties file to adjust settings like game mode, difficulty, player limit, and more. Save the file and restart the server for changes to take effect.
What’s the difference between the gamemode settings?
survival: Standard gameplay with health and hunger.creative: Unlimited resources and flying mode.adventure: Designed for custom maps with interaction limits.spectator: Observe the world without interacting.
Can I install mods or plugins on my server?
Yes, but you’ll need to use a mod-compatible server type like Forge for mods or Spigot/Bukkit for plugins.


