Getting Started with Litematica: What You Need to Know
If you want to build amazing things in Minecraft 1.21.5 or 1.20.4, Litematica can help. It’s a Minecraft mod that shows blueprints right in your world, so you can follow them block by block. You can copy builds, place schematics, and even use it in Survival Mode. In this guide, we’ll show you how to download, install, and start using Litematica in Minecraft Java 2025. It works great for Minecraft 1.21+, and it makes big builds way easier and more fun.
Quick Navigation
- Requirements
- Step 1: Download Litematica
- Step 2: Install Litematica
- Step 3: Use Litematica
- Litematica Troubleshooting
- FAQs about Litematica
Requirements
- Fabric: If you haven’t installed it yet, don’t worry! Check out our step-by-step guide on How to install Fabric.
- Java 21: Required for Minecraft version 1.20.5 and above.
Step 1: Download Litematica
Let’s start by downloading the Litematica from either Modrinth (if available) or GitHub (if the version you want is not on Modrinth).
- Click the Modrinth button, and if the version you are looking for is not listed yet, check the GitHub page.
Litematica


If Modrinth has the version that you are looking for, hit the download button.

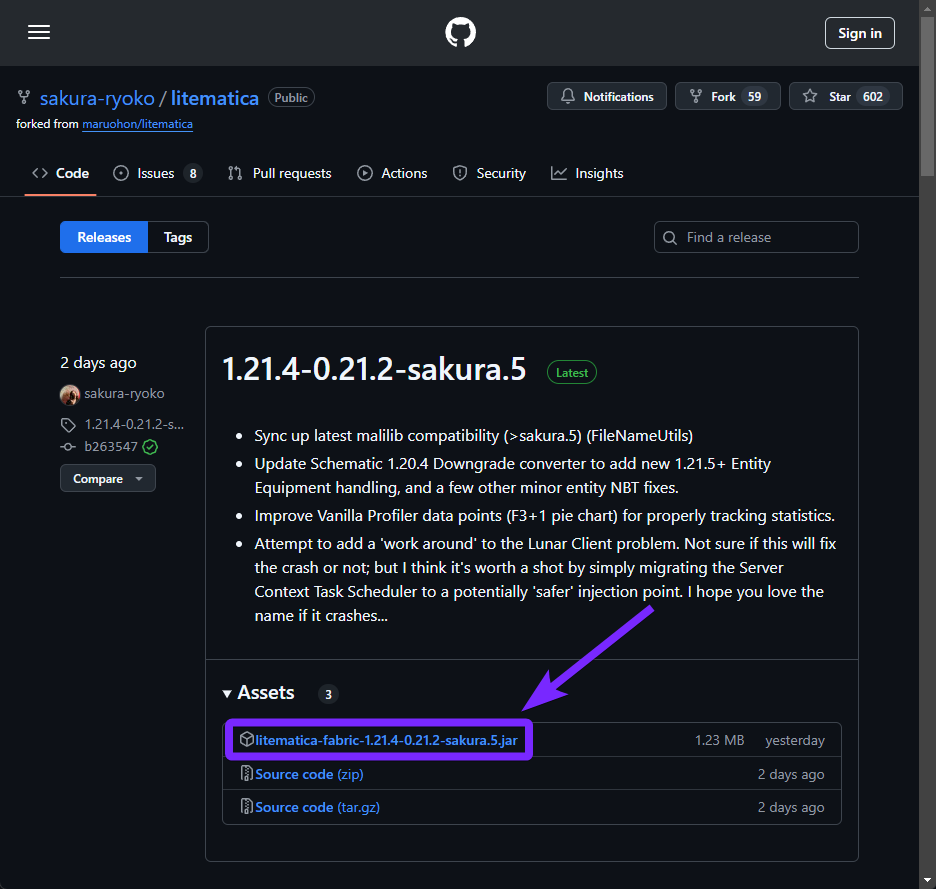
However, if using the GitHub page, look for your desired version.
- Click the “litematica-fabric-xx-sakura.jar” as shown below to start the download.
Once Litematica is downloaded, we need to get its required library, a mod called Malilib.
- Follow the same process as we did before, this time, to download Malilib.
Malilib
Once in the page is basically the same steps as before.
- Click the “malilib-fabric-xx-sakura.jar” to start downloading it.

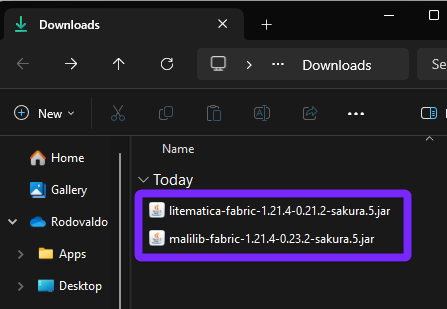
Now when you open your Downloads folder, you should see both files: Litematica and Malilib. Keep that folder open—you’ll need those files in just a minute.
Alright, now let’s move on and get Litematica installed in Minecraft.
Step 2: Install Litematica
Now that you’ve downloaded Litematica, it’s time to install it into Minecraft.
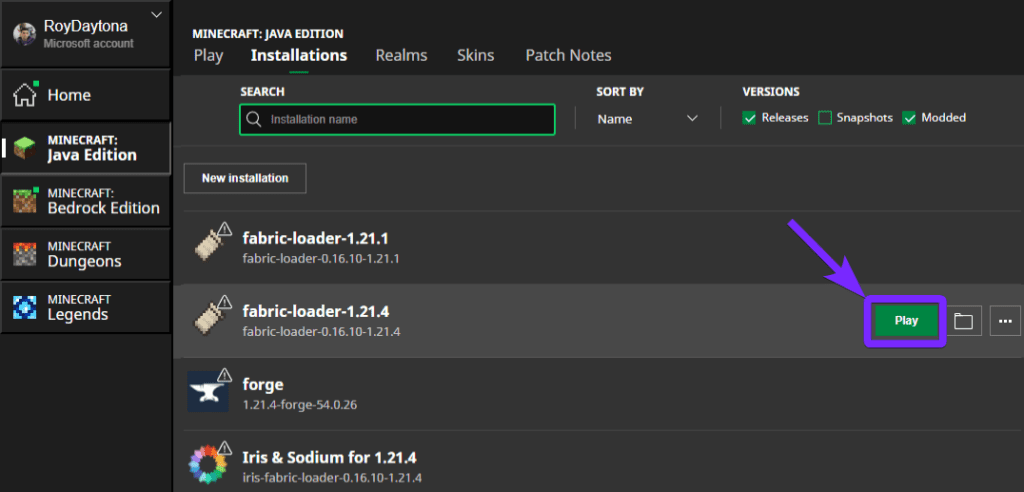
- Open the Minecraft Launcher and next to your Fabric installation click the “Folder” icon.
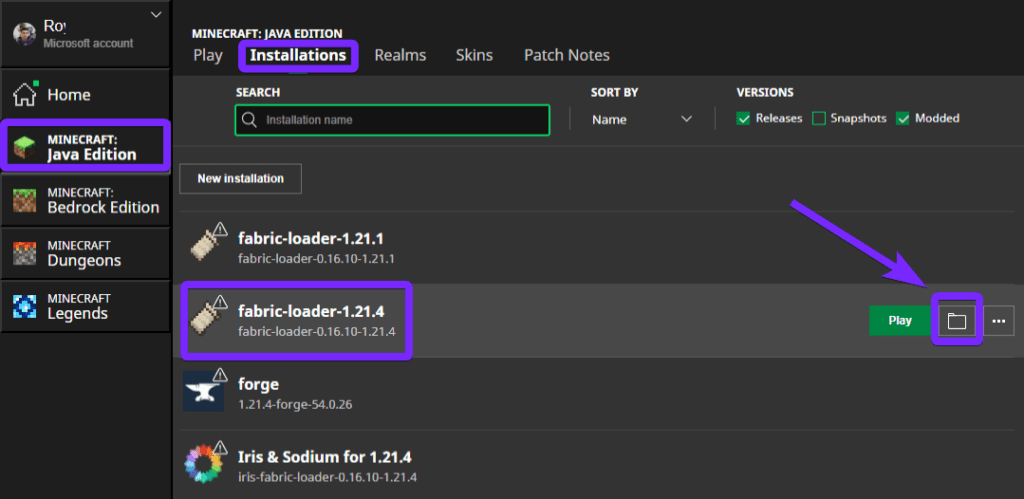
This will open a window showing all your Minecraft game folders.
- Find the folder named “mods” and open it. If you don’t see one, go ahead and create a new folder called mods.

- Now take the Litematica and Malilib files you downloaded earlier and drag them into the mods folder.

If you followed the steps correctly, Litematica should now be installed. Let’s open the game and make sure it’s working.
Step 3: Use Litematica
Go ahead and launch Minecraft to check if Litematica is working and to start testing it out.
Once Minecraft loads, you can either create a new world or jump into one you already have.
- Press the M key on your keyboard to open the Litematica menu and see all its options.

If you’ve reached this point, it means Litematica is working just fine.
- To start using it, hold a stick in your hand while playing.
- Hold down the CTRL key and scroll with your mouse wheel to switch between different modes.
- Use ALT plus the scroll wheel to expand your selection area.
And that’s it—you now know how to download and install Litematica for Minecraft Java in 2025. Whether you’re building something huge or following a schematic, this mod makes everything easier. Now that you’ve got the basics down, it’s time to explore what Litematica can really do.
Litematica Troubleshooting
Litematica not showing up in Minecraft
If Litematica doesn’t show up in your mod list or doesn’t work in Minecraft 1.21.5, make sure you’re using the Fabric version of the game. You must launch Minecraft with the Fabric profile. Also, check that both the Litematica and Malilib files are inside your mods folder. Make sure you downloaded the right version of each file for the Minecraft version you are using.
Litematica menu not opening (M key not working)
If pressing the M key doesn’t open the Litematica menu, another mod might be using the same key. Go to Options, then Controls, and look for “Litematica” in the Keybinds section. Change the key to something else if needed. If you’re using a Mac, try holding FN and then pressing M, since some keys work differently on Mac.
Schematics not loading or invisible
If your .litematic schematic doesn’t appear in-game, make sure it’s inside the schematics folder in your .minecraft folder. Then open Minecraft, press M, go to Load Schematics, and make sure your file is selected. If you still don’t see it, raise your render distance in Video Settings—some big builds won’t load if the view distance is too low.
FAQs about Litematica
Do I need Fabric to run Litematica?
Yes. Litematica is a Fabric-based mod, so you must install Fabric and the Malilib library for it to work properly. If you haven’t installed Fabric yet, follow this guide to set it up before adding Litematica.
Where do I place schematic files for Litematica?
You need to put .litematic files inside the “schematics” folder. To do this:
- Open your
.minecraftdirectory. - Find (or create) a folder called “schematics” inside
.minecraft. - Place your
.litematicfiles there, then load them using M > Load Schematics in the game.
Can I use Litematica in Survival Mode?
Yes! Litematica works in Survival Mode and even has an Easy Place Mode. It shows ghost blocks so you can build faster and easier. Just hold CTRL and scroll to switch to Easy Place Mode. When it’s active, right-click on ghost blocks to place them—as long as you have the materials.


